
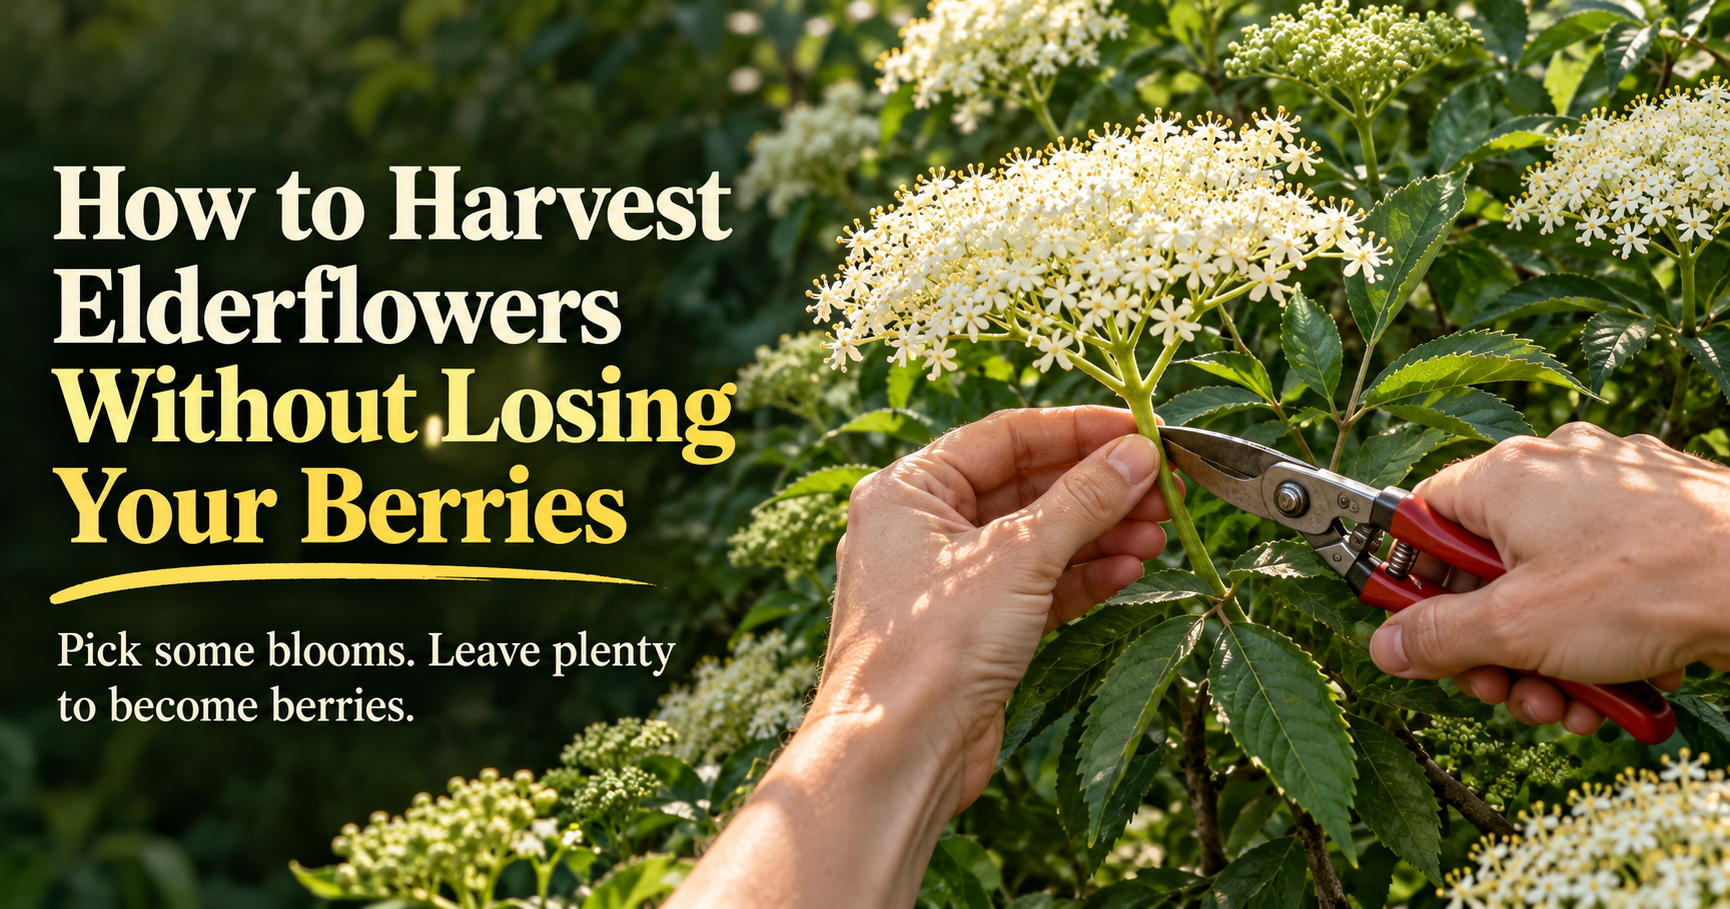
If you’ve ever walked outside and found your elderberry bushes covered in beautiful white flowers, you’ve probably wondered whether you could actually do something with them.
You absolutely can.
Those flowers can be harvested and used in homemade elderflower syrup, cordial, tea, and other recipes.
But there’s something I think every elderberry grower should understand before reaching for the pruning shears.
Every flower cluster you remove is one less cluster that can produce elderberries later.
That’s the part that makes harvesting elderflowers a little different from picking most other edible flowers around the garden.
You’re not simply collecting blossoms.
You’re deciding how much of your future berry harvest you’re willing to give up.
Fortunately, you don’t have to choose between harvesting elderflowers and enjoying elderberries later in the season.
With a little planning, you can enjoy both.
Here’s how I approach harvesting elderflowers, what I look for before cutting, and how I’d protect as much of the future berry crop as possible.
When Are Elderflowers Ready to Harvest?
The best time to harvest elderflowers is when most of the tiny flowers within each cluster have opened.
I wouldn’t harvest a cluster that’s still covered in tight, unopened buds.
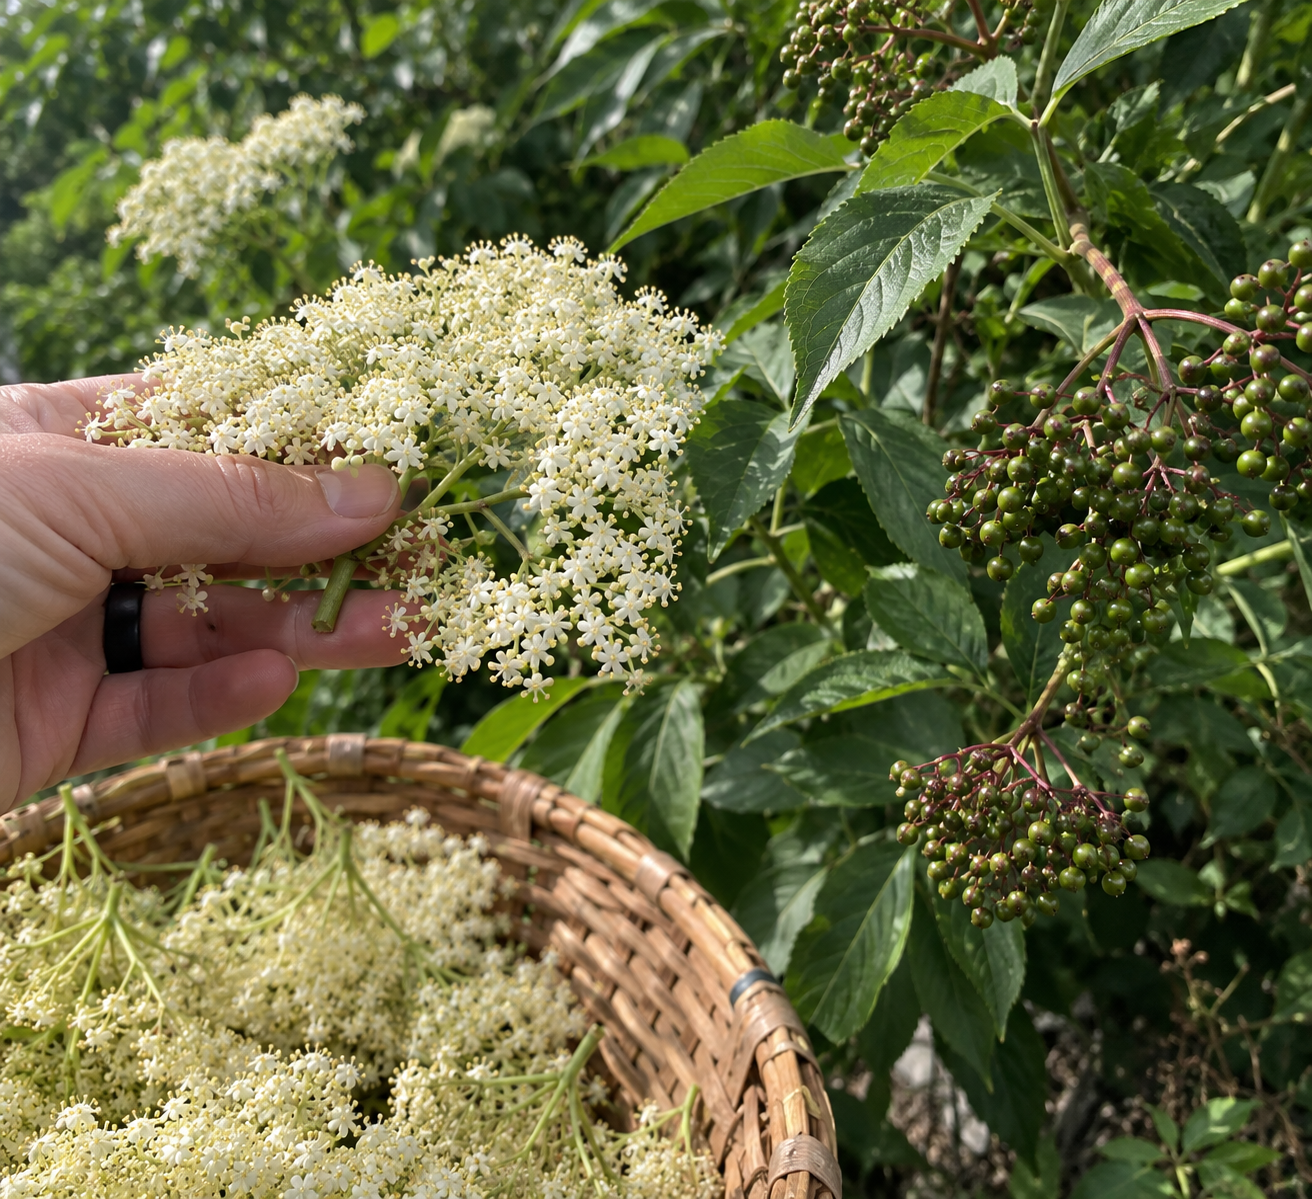
Those flowers haven’t reached the stage I’m looking for.
Instead, I want a flower head that looks full, fresh, and creamy white.
The individual blossoms should be open, and the entire cluster should look healthy.
I also avoid flowers that are already beginning to turn brown or drop their petals.
By that point, the cluster is moving past its prime.
If tiny developing berries have already started forming, I’ve missed the ideal window for harvesting that particular cluster.
That’s not necessarily a bad thing.
It simply means the plant has already begun working toward its berry harvest.

What Does a Perfect Elderflower Cluster Look Like?
A good elderflower cluster has a surprisingly distinctive appearance.
Instead of one large flower, you’ll see dozens or even hundreds of tiny individual blossoms arranged together.
The overall flower head often looks broad and somewhat flattened.
From a distance, it can resemble a little umbrella made from white flowers.
Up close, you can see just how many individual blossoms are involved.
When choosing which clusters to harvest, I’d look for:
- Mostly open flowers.
- Fresh cream-colored or white blossoms.
- Little or no browning.
- No obvious insect damage.
- No signs of mold or decay.
- No developing berries.
I also pay attention to the fragrance.
Fresh elderflowers have a distinctive floral aroma that contributes to the flavor of recipes made from them.
If a cluster looks old, damaged, or past its prime, I leave it alone.
There are usually better flowers available on a healthy, mature bush.
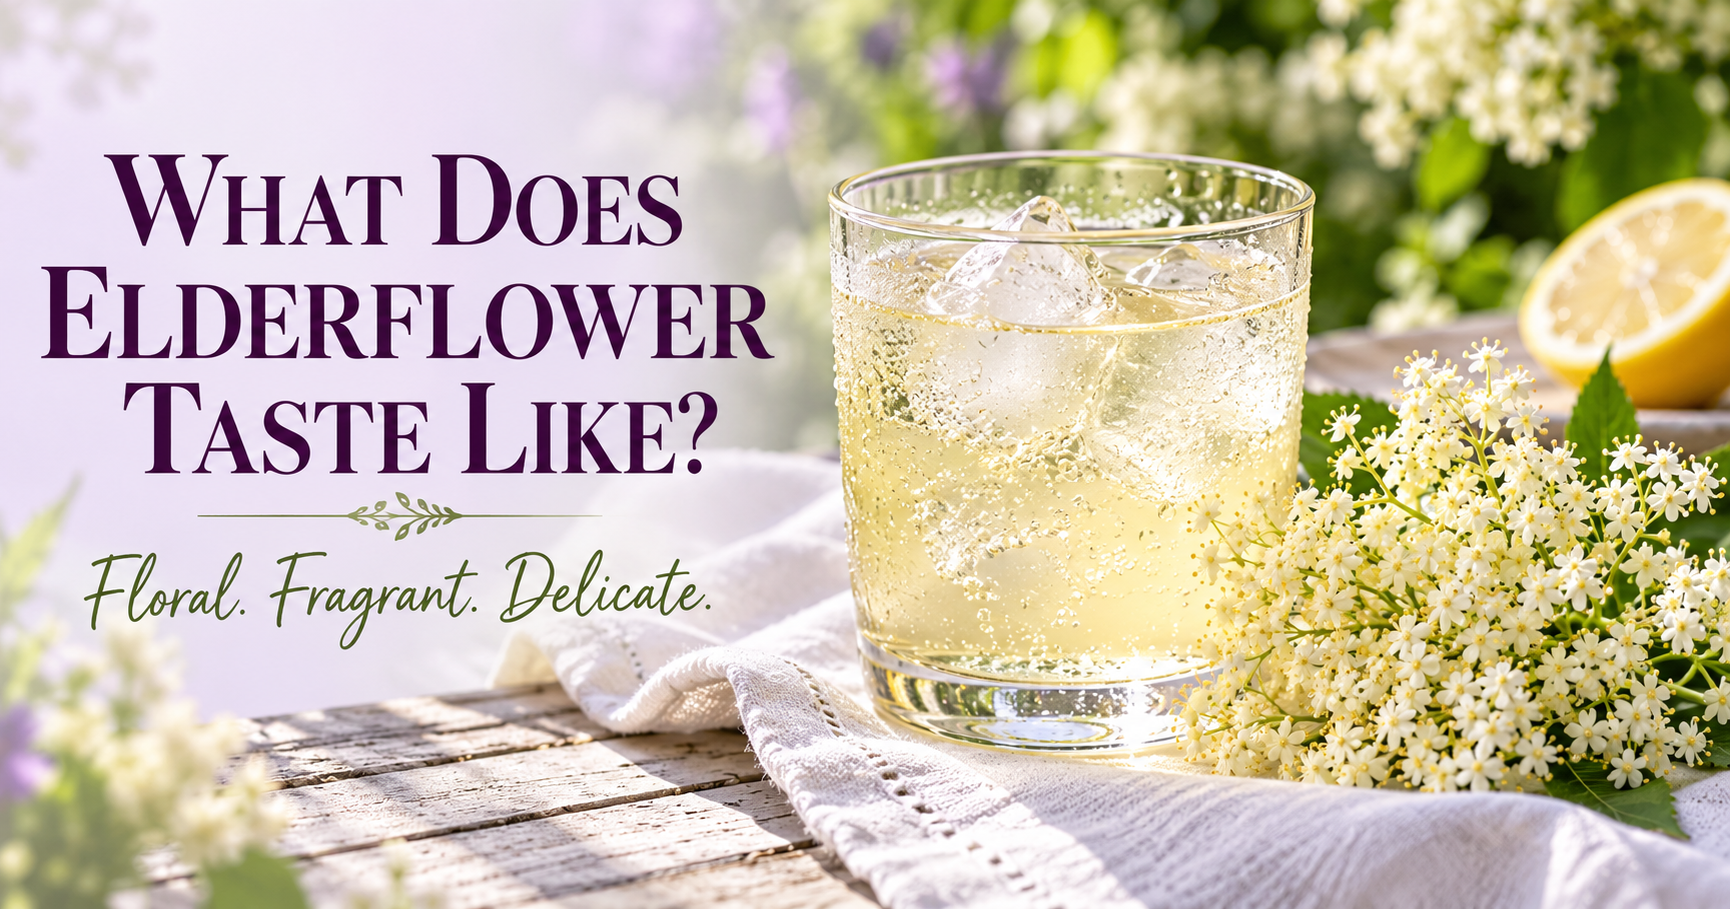


What Month Should You Harvest Elderflowers?
That depends on where you’re growing them.
In Missouri and much of the Midwest, American elderberries commonly flower during late spring and early summer.
May, June, and July are the months I’d pay the closest attention to, although the exact timing depends on the weather, location, and variety.
Some years flowering begins earlier.
Other years a cool spring delays things.
That’s why I wouldn’t rely entirely on a calendar.
The plant itself tells you when it’s ready.
Once the flower clusters begin opening, I start checking them regularly.
A few days can make a noticeable difference during peak flowering.
The Best Time of Day to Pick Elderflowers
If I’m planning an elderflower harvest, I’d choose a dry morning after the dew has evaporated.
That gives me a chance to collect fresh flowers before the hottest part of the day.
I wouldn’t deliberately wait until late afternoon when the flowers have spent hours sitting in intense summer heat.
I also avoid harvesting while the flowers are soaking wet.
Heavy rain can damage delicate blossoms and make handling more difficult.
The goal is simple.
Fresh flowers.
Dry conditions.
Cooler temperatures.
And enough time afterward to process what I’ve harvested.

Don’t Harvest Immediately After Heavy Rain
This is one of those little details that’s easy to overlook.
If a thunderstorm just rolled through and every elderflower cluster is dripping wet, I’d wait.
Wet flowers are harder to handle, especially when you’re trying to preserve their delicate fragrance.
Excess moisture can also become a problem if you’re planning to dry the flowers rather than use them immediately.
I prefer waiting until the clusters have dried naturally.
That doesn’t necessarily mean waiting several days.
Sometimes a dry morning after the weather clears is all you need.
But I wouldn’t intentionally collect soaking wet flowers simply because I happened to have time that afternoon.
How to Harvest Elderflowers Step by Step
You don’t need expensive equipment to harvest elderflowers.
A clean pair of sharp garden scissors or small pruning shears is usually enough.
I also like having a clean basket or shallow container nearby so the flowers don’t get crushed while I’m collecting them.
Here’s the process I’d follow.
Step 1. Identify the Plant Before Harvesting
This is especially important if you’re collecting elderflowers from somewhere other than your own established plants.
Not every shrub with clusters of white flowers is an elderberry.
Some unrelated plants can look surprisingly similar.
I want to identify the entire plant, including its leaves, stems, growth habit, and flowers, rather than relying on flower color alone.
If I can’t confidently identify the plant as a suitable edible elder species, I don’t harvest it.
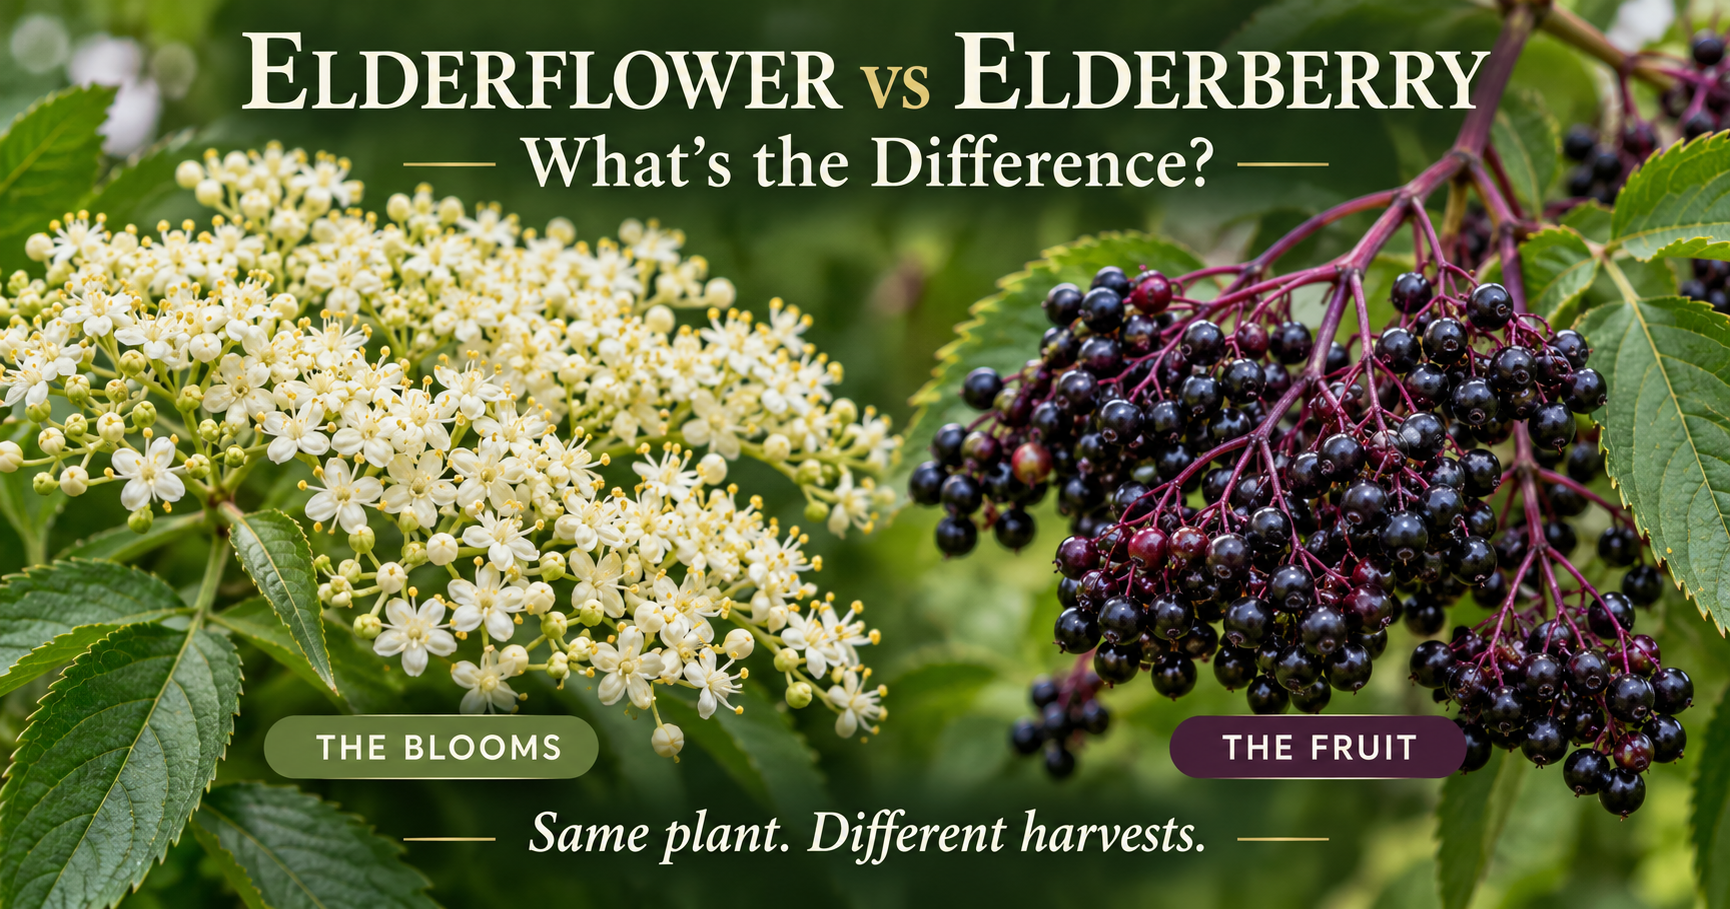
For anyone interested in the differences between the flowers and berries themselves, my guide to elderflower vs. elderberry explains how the flowers develop into fruit and why the two ingredients are used differently.
Step 2. Choose Fresh, Fully Open Flower Heads
Once I’ve identified the plant, I look for healthy flower clusters.
I skip unopened buds.
I skip browning flowers.
And I leave clusters that have already started developing berries.
The best clusters are the ones that look fresh and have most of their individual blossoms open.
Step 3. Inspect for Insects and Contamination
Before cutting anything, I look closely at the flowers.
Tiny insects are normal outdoors, but I don’t want to bring an entire colony into the kitchen.
I also avoid flower clusters with visible animal droppings, obvious contamination, or signs of chemical exposure.
If a cluster is questionable, I leave it.
There is no reason to take unnecessary chances when other healthy flowers are available.
Step 4. Cut the Flower Cluster Cleanly
I use sharp scissors or pruning shears to cut the flower head where its main stalk joins the branch.
I don’t yank it off.
Pulling can damage surrounding growth or tear the branch.
A clean cut is easier on the plant and makes the flowers easier to handle afterward.
I also avoid cutting away more leafy growth than necessary.
I’m harvesting flowers, not pruning the entire bush.
Step 5. Place the Flowers Gently Into a Container
Elderflowers are delicate.
I don’t cram them into a small bucket and press everything down to make room for another cluster.
Instead, I place them loosely into a clean basket or shallow container.
That helps prevent crushing and makes them easier to inspect when I bring them inside.
Step 6. Keep the Harvest Cool
Once I’ve collected enough flowers, I move them out of direct sunlight.
I don’t leave a basket of elderflowers sitting in a hot vehicle or baking on the porch.
The sooner I can get them somewhere cool and begin preparing them, the better.
Fresh elderflowers are not something I’d harvest and then forget about for several days.



How Many Elderflowers Can You Harvest Without Hurting Your Berry Crop?
This is the question I think matters most.
And I don’t believe there’s one perfect percentage that works for every elderberry bush.
Some growers might suggest harvesting a quarter of the flowers.
Others might recommend taking even fewer.
But those numbers aren’t universal guarantees.
A young bush with six flower clusters is completely different from a mature shrub covered in dozens of them.
If berry production is my priority, I would take a conservative approach.
Harvest a limited number of flower clusters from healthy, established plants.
Leave the majority behind.
And pay attention to how the bush performs throughout the rest of the growing season.
The more flowers you remove, the fewer potential berry clusters remain.
That’s the tradeoff I never want to forget.
Why I Wouldn’t Strip One Branch Completely
Imagine walking up to a mature elderberry bush and finding one branch covered in beautiful flowers.
It would be tempting to harvest every cluster within easy reach.
But I prefer spreading the harvest around the plant.
Take a little here.
Maybe another cluster from a different branch.
Leave plenty untouched.
This doesn’t magically guarantee better pollination or bigger berries, but it helps prevent me from removing all the potential fruit from one section of the bush.
It also encourages me to look at the entire plant rather than focusing only on the easiest flowers to reach.


Young Elderberry Bushes Deserve Extra Caution
If I had just planted a young elderberry bush, I wouldn’t be in a hurry to harvest every flower it produced.
Young plants are still establishing their root systems and developing strong canes.
They need time.
A mature elderberry bush can potentially produce an impressive number of flower clusters.
A young plant may only produce a handful.
That’s a big difference.
If a first-year plant produces just a few flowers, I’d generally leave them alone rather than treating them as a meaningful culinary harvest.
Once the bush becomes larger and more established, there will be more opportunities to collect flowers.
If you’re still waiting for your bushes to mature, How Long Does It Take an Elderberry Bush to Produce Fruit?explains what to expect during those early growing seasons.
Harvesting Flowers Affects Future Pollination
Elderflowers aren’t just something pretty growing on the bush.
They’re also where the future berry crop begins.
When flowers remain attached, pollinators can visit them and transfer pollen.
Successful pollination allows fruit development to begin.
Remove those flowers and that particular cluster no longer has the opportunity to produce berries.
That’s why I pay attention to how many flowers I’m leaving behind.
If you have only one elderberry bush and struggle with berry production already, I’d be especially cautious about removing flower clusters.
My guide explaining whether elderberry bushes need another plant to produce berries covers why compatible varieties and pollination can make such a difference.
I want my remaining flowers to have every reasonable opportunity to develop into healthy fruit.


Should You Harvest Every Flower Cluster That’s Ready?
No.
Just because a flower is ready doesn’t mean you have to pick it.
That’s one of the biggest differences between harvesting elderflowers and harvesting ripe fruit.
With ripe berries, waiting too long can mean losing them to birds or spoilage.
With elderflowers, leaving them on the bush is often exactly what I want.
Those flowers are the beginning of the berry harvest.
So I don’t see a bush covered in ready-to-pick elderflowers and assume I need to collect them all.
I decide how many I actually need.
Then I leave the rest alone.
What If You Want Both Elderflowers and Elderberries?
This is the approach I like most.
You don’t have to dedicate an entire elderberry bush exclusively to flowers or berries.
If the plant is mature and healthy, you can potentially enjoy both harvests.
Take a modest number of flower clusters while they’re fresh.
Use them for your chosen recipe.
Leave plenty of other clusters attached.
Then allow the remaining flowers to develop into berries as the season progresses.
There’s something particularly satisfying about getting two different ingredients from the same plant.
But I wouldn’t sacrifice an entire future berry harvest just because I wanted one more batch of elderflower syrup.
What Should You Do With Elderflowers Right After Harvesting?
Once the flowers come inside, I don’t leave them sitting around all afternoon while I decide what to make.
Fresh elderflowers are delicate.
If I’m making something with them, I’d rather process them while they’re still fresh and fragrant.
First, I spread the flower heads out somewhere clean and inspect them carefully.
That gives any tiny insects I missed outside another opportunity to reveal themselves.
It’s amazing how something that looked perfectly clean on the bush can suddenly have a few little visitors crawling around once it’s sitting on the counter.
That’s normal when you’re harvesting something straight from the garden.
Should You Wash Elderflowers?
This is one of those questions where I don’t think aggressively rinsing every flower under the faucet is necessarily the best approach.
Part of elderflower’s character comes from the fragrant blossoms and pollen.
A hard rinse can wash some of that away.
If I’ve harvested clean flowers from my own known plants, I prefer inspecting them carefully and gently shaking out insects rather than automatically blasting every cluster with water.
That doesn’t mean I use visibly dirty flowers.
If a cluster is contaminated, muddy, covered with something questionable, or otherwise makes me uncomfortable, I skip it.
Food safety matters more than saving one flower head.
I’d rather start with cleaner flowers than try to rescue bad ones afterward.
Give the Tiny Insects Time to Leave
I don’t expect flowers growing outside to be completely insect-free.
Elderflowers attract pollinators for a reason.
After harvesting, I like giving the clusters a little time to sit loosely rather than immediately packing everything into a container.
A gentle shake often dislodges small insects.
You can also inspect the underside of the flower heads where tiny bugs may be easier to miss.
I don’t crush or beat the flowers trying to make them sterile.
I’m simply checking them carefully before bringing them into a recipe.
Remove the Larger Green Stems
Once I’m ready to use the flowers, I remove as much of the larger green stem material as practical.
The blossoms are what I want.
You don’t need to sit there with tweezers removing every microscopic stem attached to every tiny flower.
That would make harvesting elderflowers miserable.
Instead, I trim away the larger stalks while keeping the flower-heavy portions.
This becomes especially easy when you’re preparing the flowers for syrup because the whole cluster structure is already visible.
Use Fresh Elderflowers for Syrup While They’re at Their Best
If I’ve gone through the trouble of harvesting fresh, fragrant elderflowers, syrup is one of my favorite ways to take advantage of them.
The flowers can be infused with sugar syrup and lemon to capture that light floral character while the blossoms are still fresh.
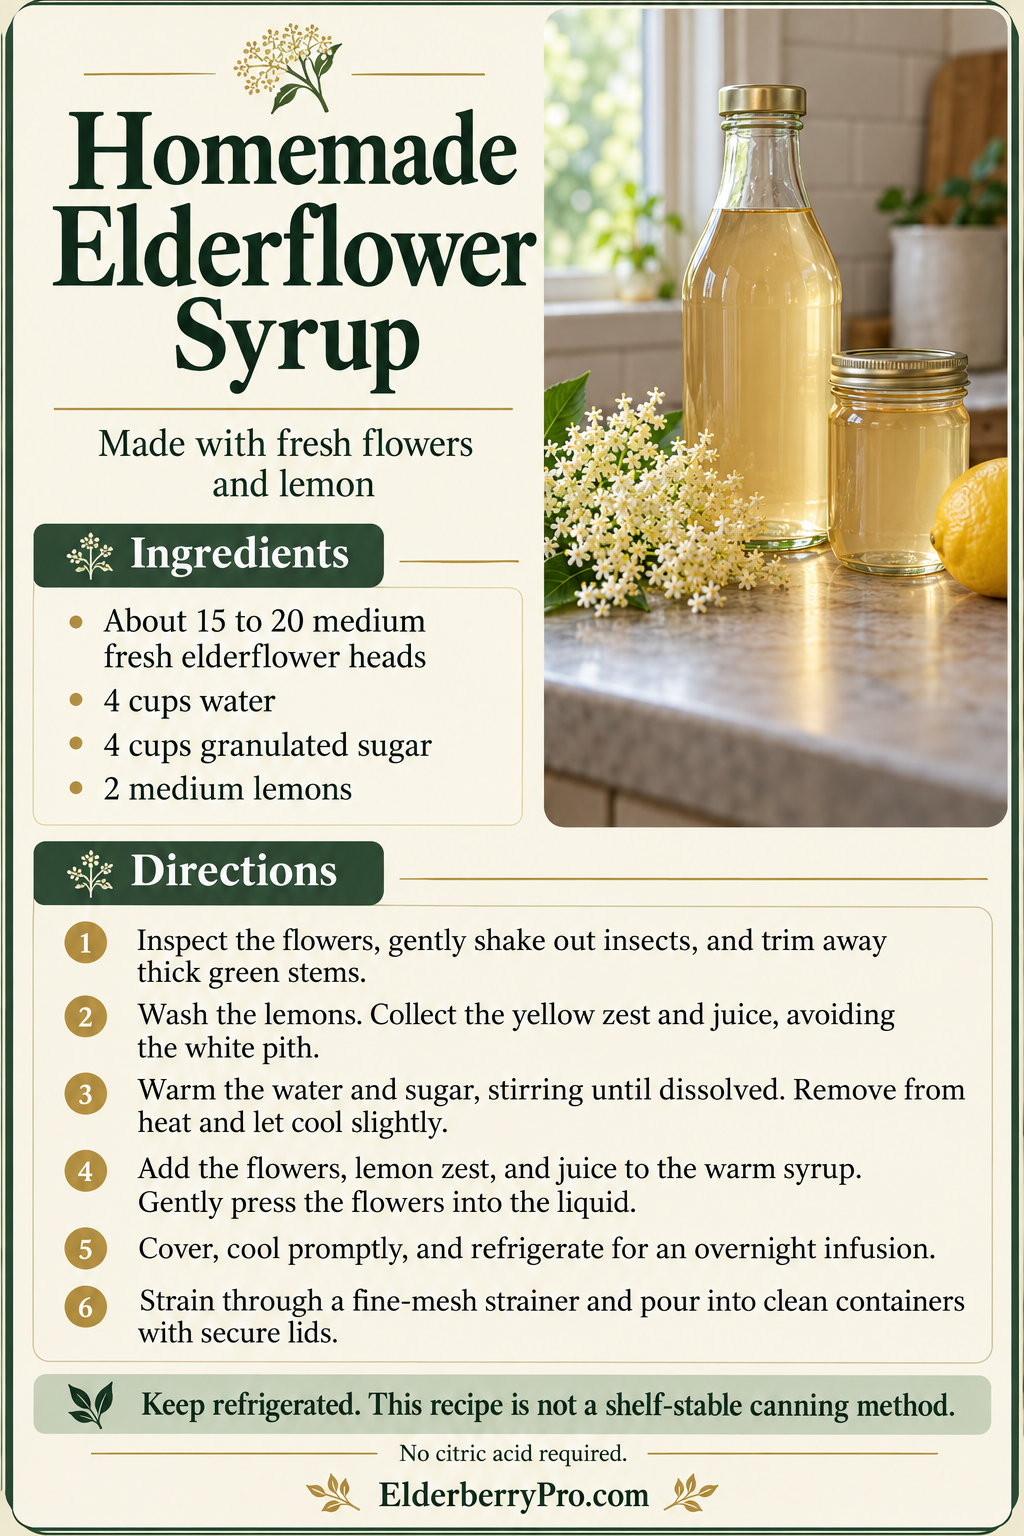
I’ve put the entire process, including exact measurements, infusion time, straining, refrigeration, freezing, and troubleshooting, into my homemade elderflower syrup recipe.
That’s also why I like planning before harvesting.
If the recipe needs roughly 15 to 20 medium flower heads, I don’t need to come inside carrying 75.
Harvest what you’re actually going to use.
Leave the rest on the bush.
Can You Store Fresh Elderflowers Before Using Them?
I think fresh elderflowers are best treated as something you harvest when you’re ready to use them.
They’re not like dried elderberries that can sit in a pantry for months.
If I absolutely couldn’t use the flowers immediately, I’d keep them cool and process them as soon as practical rather than leaving them on the kitchen counter.
I also wouldn’t harvest a huge quantity today because I might want to make something three days from now.
The bush itself is a pretty good storage system until you’re ready.
Leave the flowers attached.
Harvest them when you actually need them.
Can You Dry Elderflowers Instead?
Yes, and this is where elderflowers become useful beyond their short fresh season.
Properly dried elderflowers can be stored and used later rather than requiring you to make every elderflower recipe during the brief flowering window.
But drying deserves more than a quick paragraph.
Moisture becomes extremely important when storing dried flowers.
Flowers that aren’t sufficiently dry before storage can develop problems later.
That’s why How to Dry Elderflowers and Store Them for Later remains a useful future article for this cluster even though we’re giving the site a break after this one.
For today’s harvest, decide before picking whether you’re using the flowers fresh or preserving them.
That prevents you from collecting more than you can reasonably handle.
Do Elderflowers Grow Back After You Cut Them?
Don’t expect the same flower cluster to regenerate and give you another bloom a few days later.
Once you’ve cut that cluster from the plant, it’s gone.
The elderberry bush may have other flower clusters developing elsewhere, depending on its growth stage and variety, but the cluster you harvested isn’t going to magically replace itself and then produce berries.
That’s another reason I think of every cut as a choice.
Once I remove that flower head, I’ve committed it to the elderflower harvest.
It isn’t part of my future berry harvest anymore.
Will Harvesting Elderflowers Hurt the Bush?
Carefully removing some flower clusters from a healthy, established elderberry bush isn’t the same thing as severely pruning or damaging the plant.
The bigger consequence is usually what you’ve removed from your potential fruit crop.
That’s why I use clean, sharp scissors or pruning shears and cut only what I intend to harvest.
I don’t tear branches.
I don’t remove unnecessary leaves.
I don’t cut huge sections of cane because one flower cluster happens to be attached.
Clean harvesting keeps the impact focused on the flowers I’ve intentionally chosen.
Don’t Confuse Harvesting With Pruning
This is an important distinction.
When I’m harvesting elderflowers, I’m collecting blossoms.
When I’m pruning elderberries, I’m managing canes and the overall structure of the bush.
Those are different jobs performed for different reasons.
I don’t use elderflower harvest as an excuse to randomly reshape the plant during the growing season.
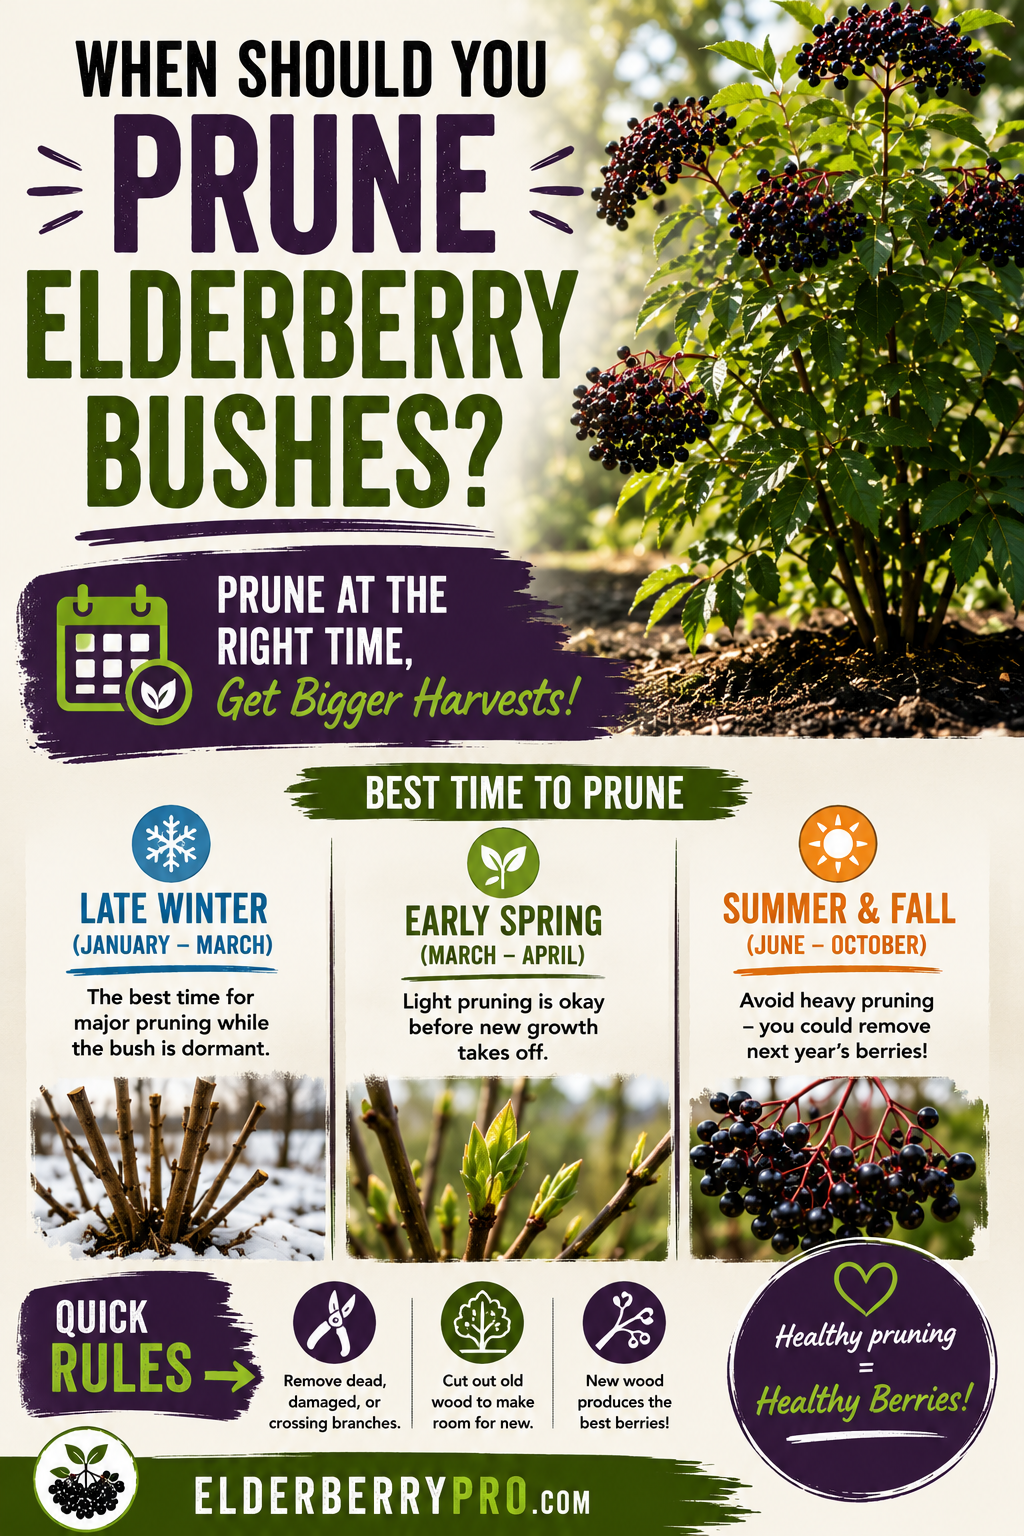
If your bush actually needs pruning, follow a pruning strategy designed around plant health and future growth. My guide on when to prune elderberry bushes explains when I handle that job and why I keep it separate from harvesting.
Common Elderflower Harvesting Mistakes
Most of the mistakes I’d avoid aren’t complicated.
They’re usually the result of getting excited and harvesting too aggressively.
Picking Flowers That Haven’t Fully Opened
Tight buds haven’t reached the stage I’m looking for.
Give them time.
Waiting Until Flowers Are Turning Brown
At the other extreme, don’t wait until the flower head is clearly declining.
Fresh blossoms are what I want for culinary use.
Harvesting Every Flower on the Bush
This is the big one if you also want elderberries.
No flowers means no berries from those clusters.
Cutting Too Much Branch With the Flower
There’s no reason to remove a large section of healthy growth just to collect a flower head.
Harvesting More Than You Can Use
Twenty beautiful flower clusters don’t help if half of them wilt on the counter before you decide what to do with them.
Picking From a Plant You Can’t Identify
This is never worth the risk.
Harvesting From Questionable Locations
I avoid plants exposed to contamination, unknown spraying, or other conditions that make me uncomfortable using the flowers in food.
Keep Track of Which Bushes Flower Best
If you grow several elderberries, harvesting season is a good opportunity to observe them.
Which plant produces the most flower clusters?
Which blooms first?
Which flowers latest?
Which attracts the most pollinators?
Which ultimately produces the biggest berry crop?
Those observations become useful over time.
They can help you decide which bushes are best for taking a few elderflowers and which ones you’d rather leave untouched for maximum berry production.
Gardening becomes much easier when you stop treating every plant as identical.
Healthy Plants Give You More Harvesting Options
A weak elderberry bush with a handful of flowers doesn’t give me many choices.
A vigorous mature plant covered in blooms does.
That’s another reason good growing conditions matter.
Sunlight.
Water.
Nutrition.
Spacing.
Pruning.
Pollination.
All of those things contribute to the overall health and productivity of the plant.
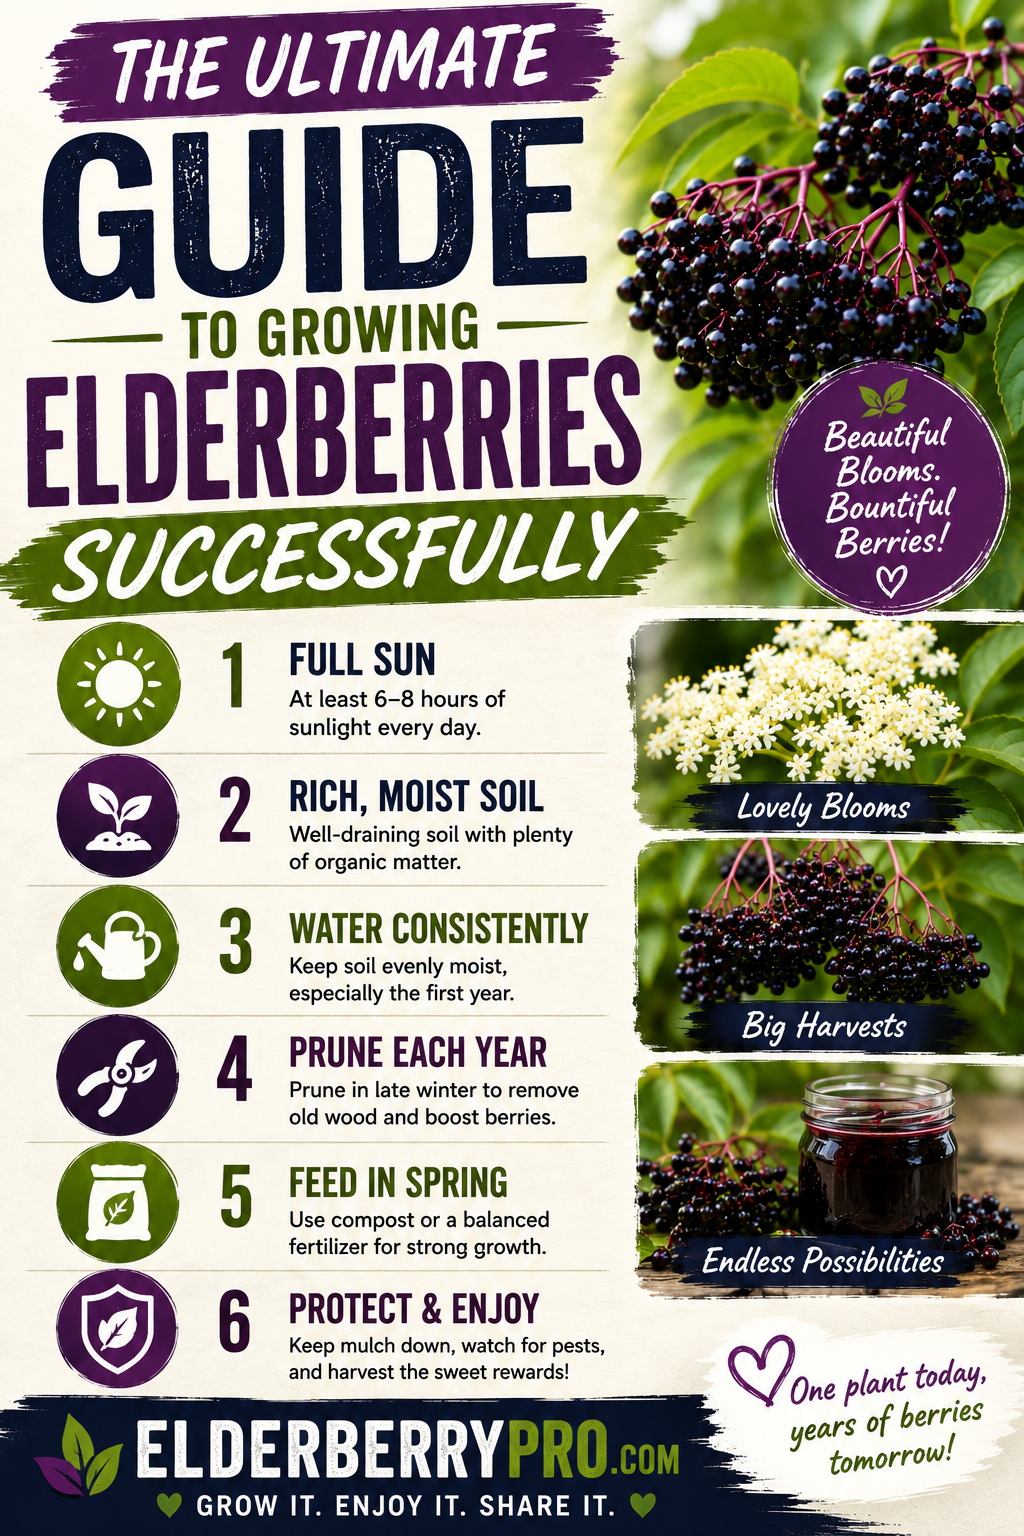
If you’re trying to reach the point where you can harvest flowers and still have plenty of berries later, my Ultimate Guide to Growing Elderberries Successfully brings the entire growing process together.
The healthier and more productive the bush becomes, the easier it is to share the harvest between flowers and fruit.
My Simple Rule for Harvesting Elderflowers
If I had to reduce this entire guide to one rule, it would be:
Take what you’ll actually use and leave plenty behind.
That solves a surprising number of problems.
You don’t overwhelm yourself with fresh flowers.
You don’t unnecessarily reduce your berry crop.
Pollinators still have plenty of blossoms.
And the plant gets to continue through its normal seasonal cycle.
There’s no reason I need to harvest every edible thing a plant produces simply because I can.
Sometimes leaving something on the plant is the better harvest decision.
What Happens to the Flowers You Leave?
This is my favorite part.
The elderflowers you don’t harvest get the opportunity to continue their job.
Pollinators visit them.
Successful flowers begin developing fruit.
Tiny green berries appear.
Those berries grow.
Eventually they darken and ripen.
Months after you harvested a handful of flowers for syrup, you may return to the same bush and collect elderberries from the clusters you deliberately left alone.
That’s what makes harvesting elderflowers different from simply buying them.
You get to watch both sides of the plant’s harvest.
Harvesting Elderflowers Without Regretting It Later
I think elderflowers are worth enjoying.
I also think elderberries are worth waiting for.
Fortunately, a healthy mature bush can potentially give you both.
Wait until the flowers are mostly open and fresh.
Harvest during dry conditions.
Use clean, sharp tools.
Choose only as many clusters as you realistically need.
Handle them gently.
Process them while they’re fresh.
And leave the majority of the flowers on the bush if berries are important to you.
That’s really the balance.
You don’t need to strip an elderberry bush bare to enjoy elderflower syrup.
Sometimes a small harvest is exactly enough.
Then you get to walk back outside later in the season and enjoy the second harvest that you intentionally left behind.
About the Author
Avery Collins writes about growing, harvesting, and preparing elderberries and elderflowers for Elderberry Pro. Avery focuses on practical home-growing advice that helps gardeners enjoy more of what their elder plants produce while keeping the plants healthy and productive from flowering through berry harvest.