
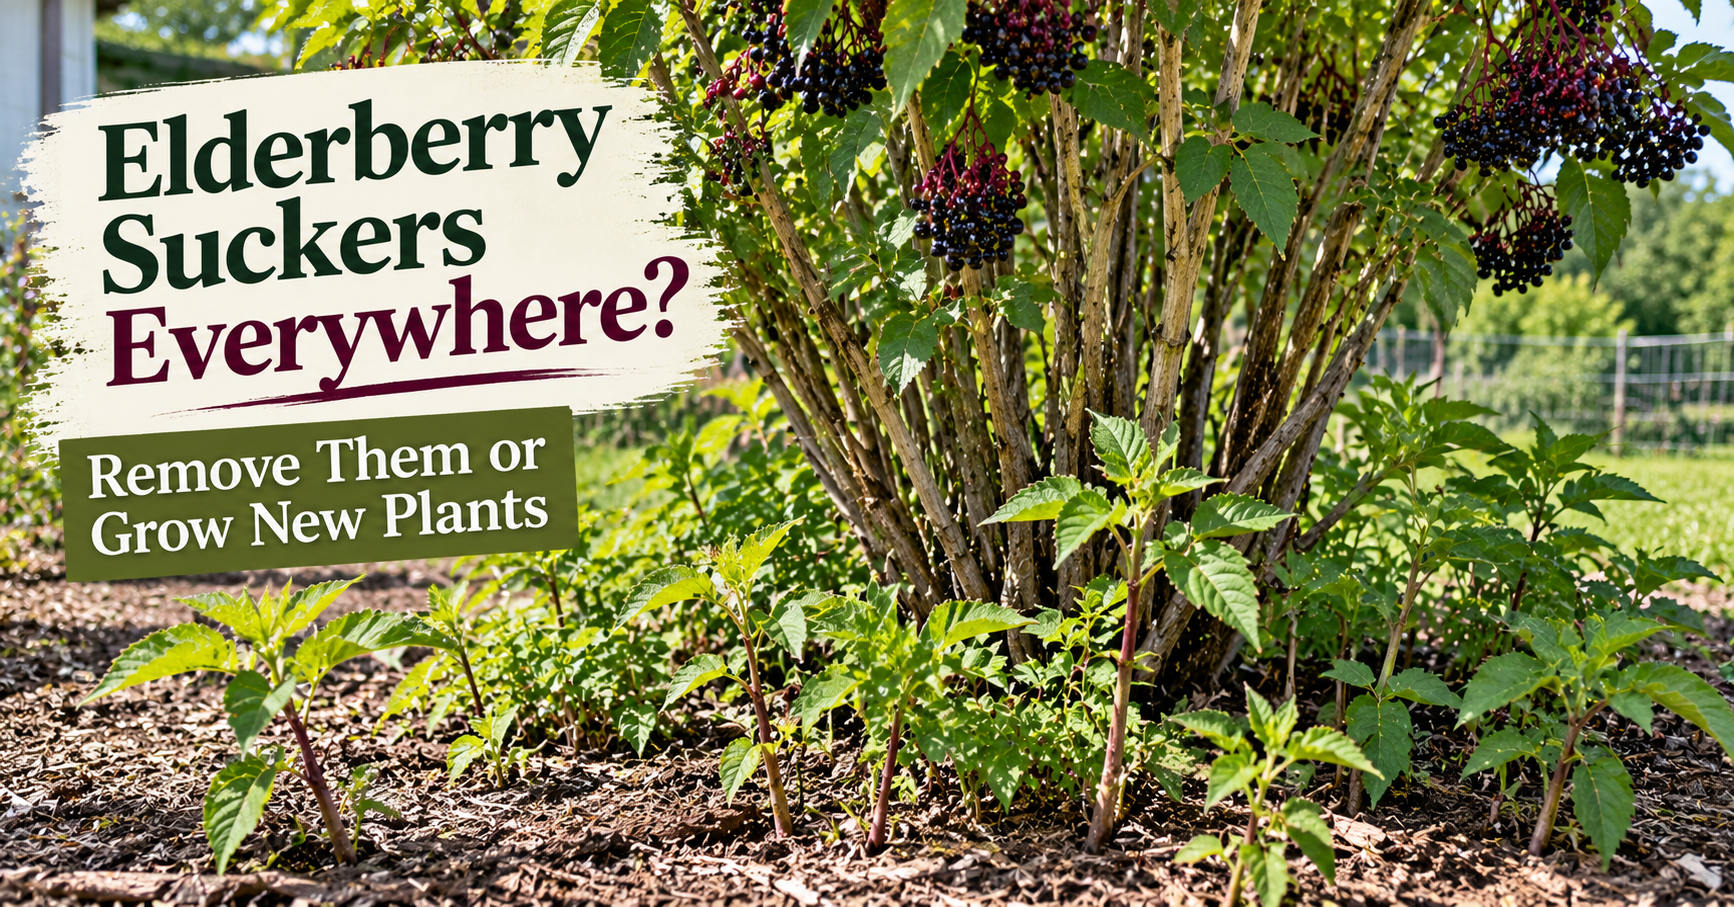
You plant one elderberry bush.
Then another stem appears a little farther over.
Then another.
Before long, you’re looking at new shoots several feet from where you originally planted the thing and wondering:
Is my elderberry spreading everywhere?
Probably.
Elderberries naturally send up new growth from their root system. Those shoots are commonly called suckers, and they can either be annoying or incredibly useful depending on what you’re trying to do with the plant.
If I want one neat elderberry bush, I manage them.
If I want more elderberry plants, I start looking at those same shoots very differently.
Because some rooted suckers can actually be dug up, separated from the parent plant, and transplanted somewhere else.
So before you mow them down, here’s how I’d decide what stays, what goes, and which shoots might be worth turning into another elderberry bush.
What Are Elderberry Suckers?
Elderberry suckers are new shoots that emerge from the plant’s spreading underground root system or around the crown.
They can appear away from the main group of canes, which sometimes makes them look like entirely separate seedlings.
But they may still be connected underground to the original plant.
That’s one of the ways elderberries naturally expand.
Given enough time without management, multiple shoots can fill the space around an established elderberry and begin creating a colony or thicket rather than one isolated shrub.
That’s normal elderberry behavior.
It doesn’t necessarily mean anything is wrong with your plant.



Why Is My Elderberry Sending Up Shoots Everywhere?
Because elderberries are naturally spreading shrubs.
A vigorous established plant doesn’t always remain confined to the exact hole you dug when you planted it.
The root system expands.
New shoots emerge.
Those shoots can become additional canes.
And eventually the planting becomes wider.

If you just read my guide on how big elderberry bushes get, this is the part of mature size that’s easy to underestimate.
You’re not only dealing with branches getting taller and wider.
You’re dealing with new growth potentially emerging from the ground around the original plant.


Are Elderberry Suckers Bad?
No.
They’re not a disease.
They’re not evidence that your elderberry is dying.
And they’re not automatically something that must be removed.
Suckers are simply part of the plant’s natural growth habit.
Whether they’re desirable depends on what you want your elderberry planting to become.
If you want a naturalized patch, some additional shoots may be welcome.
If you want one controlled bush beside a walkway, those same shoots may become annoying quickly.
Neither approach is inherently right or wrong.
The important thing is deciding rather than ignoring them for several years and then realizing your elderberry patch has expanded into an area where you never intended it to grow.
Elderberries Can Eventually Form a Thicket
This is what happens when the spreading growth is allowed to continue.
One plant sends up additional shoots.
Those shoots mature.
The root system continues spreading.
More shoots emerge.
Over time, the original “bush” can become something that looks much more like a patch of elderberry canes.
In a wildlife planting or naturalized area, that can be fantastic.
Along a property boundary, it might create a useful screen.
In the middle of a tiny landscaped flower bed, maybe not so much.
That’s why placement matters from the beginning.



Should You Remove Elderberry Suckers?
If they’re growing somewhere you don’t want another elderberry cane, yes.
I prefer dealing with unwanted suckers while they’re still small rather than waiting until they’ve become substantial woody growth.
Think about where the shoot is emerging.
Would another mature cane make sense there?
Will it crowd the center of the plant?
Is it moving into a walkway?
Is it invading a garden bed?
Is it making harvesting harder?
If the answer is yes, I don’t need to keep it simply because the elderberry produced it.
When I Would Leave a Sucker Alone
There are situations where I’d happily keep one.
Maybe I’m trying to fill out a sparse elderberry planting.
Maybe an older cane is declining and I want vigorous younger growth replacing it.
Maybe I’m intentionally creating a naturalized elderberry row.
Or maybe the sucker is growing in a convenient location and I simply don’t mind the planting becoming wider.
Elderberries continually producing new canes is part of what makes them resilient shrubs.
The goal isn’t removing every new shoot.
It’s maintaining the type of plant you actually want.


Can You Turn an Elderberry Sucker Into Another Plant?
This is where suckers become much more interesting.
If a sucker has developed its own useful roots, it may be possible to dig it up with those roots attached, sever its connection to the parent plant, and transplant it.
That gives you a head start compared with an unrooted stem cutting.
You’re not asking a bare piece of stem to produce an entirely new root system from scratch.
You’re moving a shoot that already has roots.
For a home gardener who only wants one or two additional elderberry plants, that can be an incredibly practical propagation method.
Is This the Same as Growing Elderberries From Cuttings?
No.
And this distinction is important because we already have a full cutting-propagation cluster on Elderberry Pro.
With a stem cutting, you’re taking a section of cane and encouraging it to produce roots.
With a rooted sucker, you’re digging a shoot that’s already connected to underground plant growth and trying to preserve enough roots for it to survive independently.
Both can produce another elderberry plant.
But they’re different propagation methods.

If you’re specifically starting with pieces of cane rather than rooted shoots, use my guide to growing elderberries from cuttings instead.
This article stays focused on suckers.
How Can You Tell Whether a Sucker Has Roots?
You need to investigate what’s happening below the soil.
I don’t simply grab the shoot and yank upward.
Instead, I’d carefully loosen the soil around it.
The goal is to see whether the shoot has developed enough roots of its own to make transplanting realistic.
A sucker connected to a substantial underground root or stolon may have smaller fibrous roots developing around it.
Those smaller roots are particularly useful when you’re trying to establish the separated plant.
The more healthy root material I can move with the sucker, the better chance I’d expect it to have after separation.
Don’t Rip the Sucker Out of the Ground
This is one of the easiest ways to turn a promising new plant into a stick with no useful roots.
Dig around it.
Expose what you’re working with.
Find the connection to the parent plant.
Preserve as much of the sucker’s own root system as practical.
Then make a clean separation.
You’re trying to transplant a living plant, not win a tug-of-war.


When Is the Best Time to Move an Elderberry Sucker?
I prefer doing major transplanting when conditions are relatively forgiving rather than during the hottest part of summer.
Early spring can be particularly convenient because the plant is moving into active growth while temperatures are still moderate.
Cooler conditions reduce some of the stress associated with digging and moving roots.
Fall can also work in suitable climates because the plant can focus on root establishment without dealing with intense summer heat.
Whenever you move it, consistent moisture during establishment becomes important.
A newly separated sucker no longer has the full parent root system helping support it.
Step 1. Choose the Right Sucker
I wouldn’t automatically dig the smallest shoot I can find.
I’m looking for healthy growth in a location where I can actually access the roots without badly damaging the parent plant.
I also want a shoot that looks vigorous.
No obvious disease.
No severe insect damage.
No dying foliage.
If I’m going through the trouble of creating another elderberry plant, I want to start with healthy material.
Step 2. Loosen the Soil Around It
Use a garden fork or spade carefully around the sucker.
Don’t plunge directly beside the stem and chop every root immediately.
I want to expose enough of the underground growth to understand where the shoot is connected and how much root material I can realistically take with it.
Work outward.
Take your time.
Roots are much easier to preserve when you know where they actually are.
Step 3. Find the Connection to the Parent Plant
Eventually, you should be able to see how the sucker is connected underground.
This may be through spreading root or stolon growth.
That’s the connection you’ll need to sever if you’re turning the sucker into an independent plant.
But before cutting it, look at the roots attached to the sucker itself.
If there are almost no usable roots, transplanting becomes more difficult.
I’d much rather move a sucker with a healthy collection of roots than one that’s almost entirely dependent on the parent connection.
Step 4. Make a Clean Cut
Once I’ve exposed enough of the underground growth and I’m confident the sucker has useful roots, I make a clean cut separating it from the parent plant.
Use a sharp tool.
Don’t twist and tear the underground connection until something finally snaps.
A clean cut gives you more control and causes less unnecessary damage.
Then lift the sucker with as much of its root system intact as possible.
Step 5. Replant It Quickly
I don’t dig a rooted sucker in the morning and leave it lying in the sun until evening.
Roots dry out.
Have the new planting location or container ready.
Once the sucker is separated, move it promptly.
Plant it at an appropriate depth, settle the soil around the roots, and water thoroughly.
The goal is getting those roots back into a moist growing environment as quickly as practical.
Step 6. Keep It Watered While It Establishes
The newly moved elderberry has just lost its connection to a much larger root system.
Even though you preserved roots, the plant is still dealing with transplant stress.
Consistent moisture matters.
I don’t want the soil becoming bone dry immediately after transplanting.
At the same time, I don’t want the roots sitting in stagnant water.
Moist, well-drained conditions give the plant a much better opportunity to establish.
Don’t Panic If the Sucker Looks Rough at First
Transplanting is stressful.
Some temporary wilting doesn’t automatically mean you’ve killed the plant.
You’ve disturbed roots.
You’ve moved it into a new environment.
And you’ve removed the support it was receiving from the parent plant.
Give it time.
Keep the soil appropriately moist.
Protect it from unnecessary additional stress.
Then watch for new growth.
New healthy growth is one of the best signs that the transplanted sucker is beginning to establish independently.
Should You Pot a Small Sucker Before Planting It in the Ground?
Sometimes I would.
If I’ve separated a relatively small sucker with a modest root system, putting it into a container temporarily gives me more control while it establishes.
I can monitor moisture more easily.
I can protect it from being accidentally mowed.
And I can watch for healthy new growth before committing it to a permanent location.
But elderberries grow quickly, so I wouldn’t put a rooted sucker into a tiny pot and forget about it for the next year.
Once roots begin filling the container, it’s time to give the plant more room.
If the sucker already has a substantial healthy root system and I’ve prepared a suitable permanent location, planting directly into the ground can be simpler.
Should You Cut Back the Top When Moving an Elderberry Sucker?
I wouldn’t automatically remove most of the top growth from every sucker I transplant.
How much root system survived the move matters.
A large leafy shoot with very few roots has a tougher job supplying all of that foliage than a sucker moved with a substantial root system intact.
If significant top growth is damaged or obviously out of balance with the roots I’ve managed to preserve, some selective trimming may make sense.
But I’m not trying to turn every transplanted sucker into a bare stick.
My first priority is preserving as much healthy root material as practical during the move.
Will an Elderberry Sucker Produce the Same Berries as the Parent?
This is one of the biggest advantages of vegetative propagation.
A sucker arising from the established plant is vegetative growth from that plant rather than a genetically unique seedling.
That matters if you have a named elderberry cultivar whose characteristics you want to preserve.
Growing elderberries from seed is different.
Seeds result from sexual reproduction and can produce genetically variable offspring.
So if I’m trying to reproduce a particular elderberry I already like, vegetative propagation through suitable cuttings or rooted plant material is much more predictable than planting seeds and hoping for an identical plant.
Don’t Confuse a Seedling With a Sucker
Not every little elderberry-looking plant near the parent is automatically connected to its roots.
Birds eat elderberries.
Seeds move around.
Seedlings can appear.
That’s another reason I investigate below the soil before calling something a sucker.
A true sucker is connected to the established plant’s underground growth.
A seedling is an independent plant that germinated from seed.
They may eventually look similar above ground, but their origin is completely different.
And if the parent is a named cultivar, a seedling isn’t automatically genetically identical to it.
Suckers Can Help You Expand a Pollination Planting, With One Catch
This is where genetics matter.
Let’s say you have one elderberry cultivar producing suckers everywhere.
You dig up three suckers and plant them nearby.
Now you have four plants.
But genetically, those vegetatively produced plants came from the same original plant.
If your goal is improving cross-pollination, simply cloning the same cultivar several times isn’t equivalent to planting a different compatible cultivar.
That’s an important distinction.
For better fruit production, I still like having genetically distinct compatible elderberries nearby rather than assuming multiple clones of one plant solve every pollination issue.

My guide on whether elderberry bushes need another plant to produce berries covers that question separately.
Use suckers to expand your planting.
Just don’t confuse more stems with more genetic diversity.
How Do You Remove Suckers You Don’t Want?
If I don’t want a sucker becoming another cane, I prefer dealing with it while it’s young.
Trace the shoot down toward its point of origin.
You may need to pull back a little soil to see what’s happening.
Then remove the unwanted growth as close to its origin as practical with a clean, sharp tool.
Simply clipping the top several inches above ground may leave growth capable of producing another shoot.
The goal is managing the unwanted sucker, not giving it an accidental haircut.
Can You Just Mow Elderberry Suckers?
If they’re appearing in a regularly mowed area, repeated mowing may keep the visible shoots from developing into mature canes.
But I wouldn’t expect mowing to make an established elderberry’s natural suckering tendency disappear.
You’re removing top growth.
The underground plant is still there.
That may be perfectly adequate if your only goal is keeping shoots out of the lawn.
You mow the lawn anyway, and the unwanted shoots never get a chance to become large canes.
Closer to the main planting, I prefer more deliberate management so I can decide which new canes remain and which ones go.
Don’t Spray Herbicide on Suckers Connected to a Plant You Want to Keep
This is especially important.
A sucker may be physically separated from the main elderberry above ground while still being connected through the root system below.
That means treating it like an unrelated weed can create problems.
Systemic herbicides are designed to move through plant tissue.
If the sucker is connected to the elderberry you want to keep, that’s not a situation where I’d casually spray the shoot and hope the parent plant remains unaffected.
Mechanical removal gives me far more control.
If I’m trying to preserve the elderberry, I don’t use its connected root growth as an herbicide target.
Will Cutting Suckers Make More Come Back?
Possibly.
Elderberries naturally sucker.
Removing one doesn’t change the basic growth habit of the plant.
New shoots may appear later.
That’s why I view sucker control as routine maintenance rather than a one-time cure.
It’s similar to pruning.
I don’t prune an elderberry once and expect never to touch it again.
If I want a tidy controlled shrub, I inspect it periodically and remove growth that doesn’t fit what I’m trying to maintain.
How Many Canes Should an Elderberry Bush Have?
There isn’t one perfect cane count for every backyard elderberry, especially because pruning systems differ.
But more isn’t automatically better.
Allowing every sucker and every cane to remain indefinitely can create a crowded center with poorer airflow and difficult harvest access.
West Virginia University Extension recommends maintaining roughly five to eight canes per mature bush in its pruning guidance.
For a backyard grower, I think the broader lesson matters more than obsessing over an exact number:
Keep vigorous useful canes and remove unnecessary crowding.
If your plant already looks like a tangled jungle, use my dedicated pruning guide rather than turning sucker removal into random heavy pruning.
Can Suckers Make an Elderberry Too Crowded?
Absolutely.
One sucker doesn’t look like much.
Neither does the next one.
Give every new shoot several years and suddenly you can have a dense mass of canes competing for space.
Crowding makes it harder to:
- Inspect individual canes.
- Harvest flowers.
- Reach berry clusters.
- Install bird protection.
- Notice pest damage.
- Maintain good airflow.
- Remove old or damaged wood.
That’s why I don’t evaluate suckers individually without thinking about what the entire bush will look like later.
Today’s six-inch shoot can become tomorrow’s full-size cane.
What If Suckers Are Appearing Several Feet Away?
That tells you the underground growth has expanded beyond the original crown.
Elderberries can spread through root suckers and form thickets when left unmanaged.
If I intentionally planted an elderberry in a naturalized area, that may not bother me at all.
If shoots are emerging in a flower bed, pathway, lawn edge, or somewhere else I don’t want them, I start managing the spread.
This is exactly why mature elderberry size is about more than measuring the branches.
The underground plant can expand too.
Can You Stop an Elderberry From Suckering Completely?
I wouldn’t choose an elderberry expecting to permanently eliminate one of its natural growth habits.
You can manage suckers.
You can remove them.
You can maintain a cleaner shrub.
But if your definition of success is:
This plant must never send up another shoot outside its original crown.
you’re signing yourself up for ongoing maintenance.
I’d rather understand the plant before choosing its location.
Put vigorous spreading plants where you have room to manage them.
Suckers Can Actually Renew an Older Elderberry
Not every new shoot is an enemy.
Elderberries benefit from having younger vigorous canes replacing older declining growth.
A well-positioned new shoot can become part of that renewal.
That’s why I don’t walk around automatically cutting every sucker at ground level.
I look at the entire bush.
Do I need another healthy young cane?
Is an older cane likely to come out during dormant pruning?
Is this sucker emerging somewhere useful?
Sometimes the answer is to keep it.
Plant management is more useful than automatic removal.
What If You Want an Elderberry Patch Instead of One Bush?
Then suckers become your friend.
A naturalized elderberry planting can gradually expand as new shoots emerge.
That can create habitat, flowers for pollinators, and eventually more berry-producing growth.
You still may want to manage dead, weak, damaged, or excessively crowded canes, but you don’t need to fight every new shoot.
The entire goal is different.
Instead of:
Keep this one shrub inside this exact space.
you’re saying:
Elderberries can occupy this area.
Once you make that decision, suckering stops feeling like a problem and starts becoming part of the design.
What If You Want One Neat Elderberry Bush?
Then expect some maintenance.
Remove unwanted suckers while they’re small.
Manage the number and location of canes.
Prune regularly.
And don’t allow new shoots to become established several feet away simply because you didn’t feel like dealing with them this year.
Elderberries can absolutely be kept much tidier than the wild thickets you see along roadsides and creek bottoms.
They just don’t naturally maintain that shape by themselves.
Suckers Are One of the Cheapest Ways to Get More Elderberry Plants
This is the part I like.
A sucker appearing somewhere inconvenient doesn’t necessarily need to become compost.
If it’s healthy, has useful roots, and comes from an elderberry I want to reproduce, I may be looking at another plant.
Dig it carefully.
Preserve the roots.
Separate it cleanly.
Replant it.
Keep it watered while it establishes.
That’s a pretty impressive return from something you may have originally planned to mow down.
Decide Whether Each Sucker Is a Weed or a Free Plant
That’s really how I look at elderberry suckers.
The exact same shoot can be annoying in one location and valuable in another.
Coming up in the middle of a walkway?
It’s unwanted.
Appearing where I need a replacement cane?
Maybe I keep it.
Growing from a cultivar I love when I’ve been wanting another plant?
Now I’m reaching for a shovel instead of pruning shears.
The plant isn’t doing anything wrong.
It’s doing what elderberries naturally do.
My job is deciding whether that new growth fits what I’m trying to accomplish.
Once you understand that, suckers become much easier to manage.
You stop wondering why your elderberry is “spreading everywhere” and start making deliberate choices about which shoots stay, which get removed, and which ones get a new home somewhere else.
About the Author
Avery Collins writes about growing, propagating, troubleshooting, and harvesting elderberries for Elderberry Pro. Avery focuses on practical backyard-growing information that helps gardeners understand how elderberries naturally behave and turn that growth into healthier, more productive plants.