

Why Elderberry Wine Is a Hidden Gem 🍷
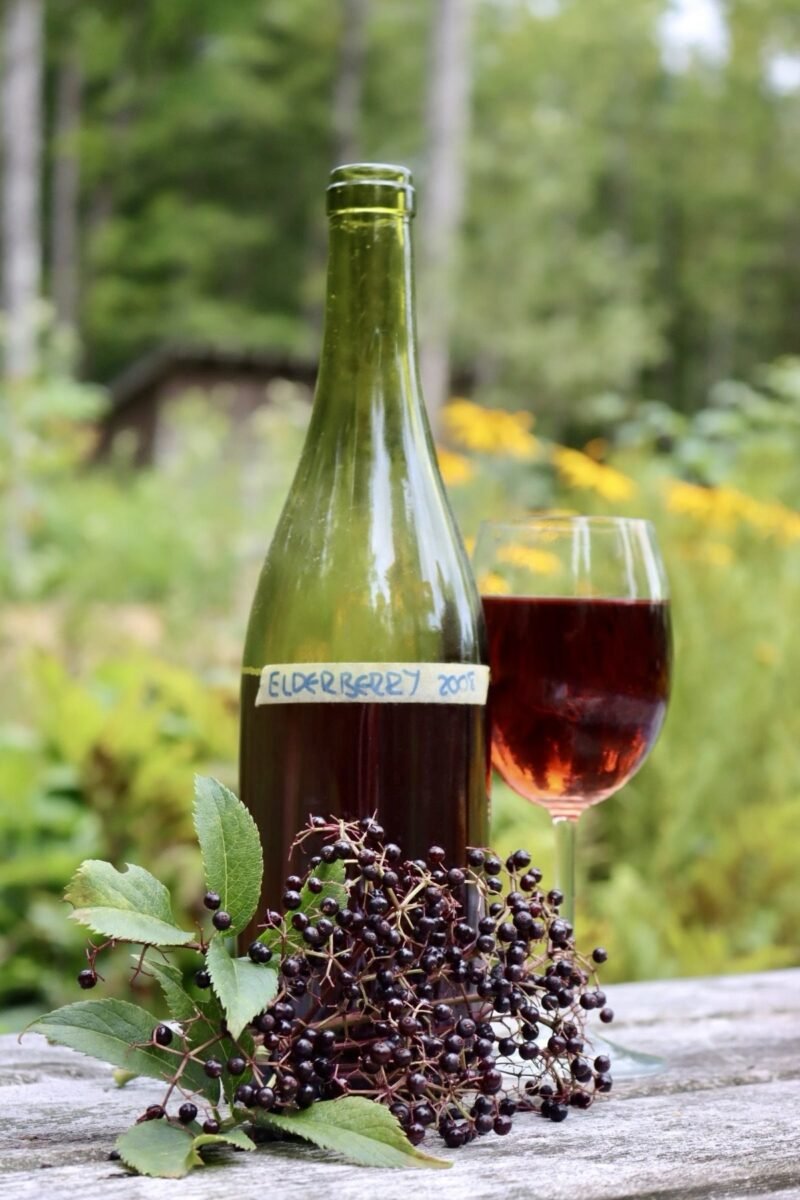
If you’ve never tried elderberry wine, you’re seriously missing out. This bold, flavorful homemade wine has deep roots in tradition, dating all the way back to early settlers who relied on what they could forage. Elderberries — those tiny dark berries from the elder tree — were a staple for their natural health benefits and their ability to ferment into something surprisingly delicious.
Unlike grape wines that often have a syrupy finish, elderberry wine leans on the earthy, rich side. It’s slightly tart, beautifully deep in color, and carries subtle notes of spice and plum. This makes it a perfect sipping wine — or even a holiday favorite if you prefer a homebrew with character.
On top of all that, it’s easy to make at home and incredibly satisfying once it’s had time to age. Whether you’re a total beginner or a home-brewing pro, elderberry wine deserves a permanent spot on your DIY to-do list.
And if you’re looking for another delicious elderberry project, you’ve got to try this apple and elderberry jelly too — it’s a sweet-tart masterpiece that’s perfect for toast or holiday gifting.
Is Elderberry Wine Good for You? (Benefits Explained)
Believe it or not, elderberry wine isn’t just a tasty treat — it might even give your immune system a little love.
Elderberries are packed with antioxidants, especially anthocyanins, which give them that deep purple color. These compounds have been shown to help reduce inflammation, support cardiovascular health, and even fight off certain viruses. Of course, turning them into wine does reduce some of their medicinal punch, but you still retain many of the nutrients and polyphenols in moderate servings.
Plus, elderberry wine is often lower in sugar than typical fruit wines, especially when homemade. You control the process, the sweetness, and the quality. That’s a huge win compared to store-bought options full of additives or preservatives.
But don’t overdo it. This isn’t a “drink for your health” type of wine — it’s more of a “sip and enjoy, knowing you’re not drinking junk” kind of experience.
If your stomach ever feels a little off after eating raw or improperly prepared elderberries, don’t panic. It’s common. Check out this guide on what might cause stomach pain after elderberries to clear up what’s going on.
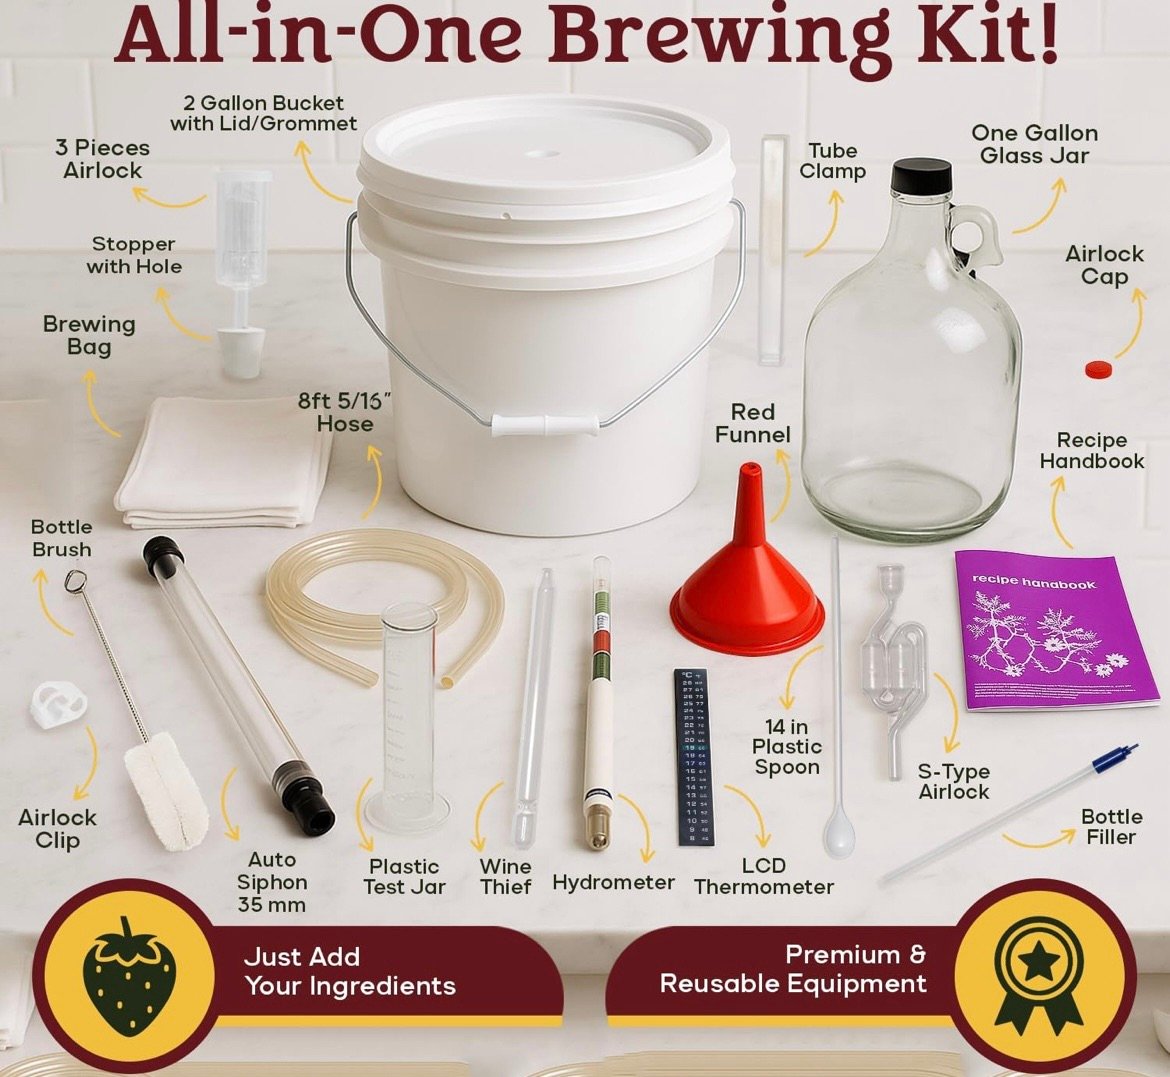
What You Need to Make Elderberry Wine at Home 🛠️
Before you dive into fermenting your own batch, let’s get your gear lined up. You can make elderberry wine with just a few basic tools, but having the right setup makes a huge difference — especially when it comes to keeping things sanitary and your batch tasting amazing.
Here’s what you’ll need:
- A large fermenter or food-safe bucket with an airtight lid
- A glass carboy for secondary fermentation
- An airlock to release gases while keeping contaminants out
- A siphon tube for clean transferring
- A hydrometer to monitor sugar/alcohol levels
- Sanitizer (this one is not optional)
Not sure where to start? You’re not alone. That’s why I recommend grabbing this complete home brewing kit 🍷from Amazon. It’s beginner-friendly but also solid enough for anyone who’s been making wine for years. It comes with everything you need — fermenter, glass carboy, airlock, hydrometer, siphon, and more. It saves time, saves guesswork, and honestly, makes the process a lot more fun.
Step-by-Step Elderberry Wine Recipe (Yes, It’s Easy)
Here’s the step-by-step method that turns fresh or frozen elderberries into a delicious homemade wine. If you’ve made jam or jelly before, you’ll find this process surprisingly doable.
Ingredients:
- 3 pounds of elderberries (fresh or frozen)
- 2 pounds of apples (or apple juice for convenience)
- 3 pounds of sugar
- 1 packet of wine yeast
- Juice of 1 lemon
- Filtered water (enough to make a 1-gallon batch)
How to Make It:
Step 1: Prep the Fruit
Gently rinse your elderberries and remove any stems or unripe berries (those are toxic raw). Chop apples if using fresh. Boil fruit in water for about 20 minutes, mashing to release the juice.
Step 2: Cool and Sweeten
Let the mixture cool, then stir in sugar and lemon juice until fully dissolved.
Step 3: Transfer to Fermenter
Strain out solids and pour the juice into your sanitized fermenter. Top off with water to hit the one-gallon mark. Add yeast and stir gently.
Step 4: Let It Ferment
Install the airlock and let it sit in a cool, dark place for 7–10 days. You’ll see bubbles — that’s your wine doing its thing.
Step 5: Secondary Fermentation
Once bubbling slows, siphon the wine into a clean glass carboy from this home brewing kit 🍷. This lets the wine clarify and age without sitting on sediment.
Step 6: Bottle and Wait (The Hard Part)
After 4–6 weeks in the carboy, bottle it up. Let it age for at least 3 months — longer if you want a smoother finish.
Still have elderberries left over? Don’t miss our easy apple and elderberry jelly recipe — it’s another fan favorite for preserving this powerhouse fruit.

How Long Should You Age Elderberry Wine?
Here’s the truth most people won’t tell you: elderberry wine gets way better with time. Sure, you can drink it a few months after bottling, but if you can be patient, you’ll be rewarded with smoother, richer, more balanced flavor.
Recommended aging timeline:
- Minimum: 3 months – drinkable, but still tart
- Ideal: 6–12 months – flavors mellow and balance out
- Best: 1+ year – fully developed, smooth, and deep
The longer you age it (as long as it’s stored properly in a cool, dark place), the better the result. If your wine tastes a bit sharp early on, don’t toss it — let time do its magic.
If you’ve ever had digestive discomfort from elderberry products, check out this guide: Stomach pain after elderberry? Here’s what might be happening. It’s a must-read before enjoying large amounts of homemade wine or syrup.
What Does Elderberry Wine Taste Like?
Elderberry wine isn’t like your typical grocery store red. It has a flavor all its own — earthy, dark, and slightly tart with deep berry notes that get smoother the longer it ages.
People often describe it as:
- Similar to a dry red wine, like cabernet or merlot
- A little wild or gamey when young (but mellow with time)
- Rich in color and bold in taste — you’ll know it’s elderberry
It pairs beautifully with hearty meals, aged cheeses, or even dark chocolate. Bonus tip: serve it slightly chilled for a more refreshing sip.
Thinking of turning it into jelly instead? You’ll love our recipe for apple and elderberry jelly, which gives that same rich flavor — just in a sweeter, spreadable form.
What Foods Pair Best With Elderberry Wine?
Elderberry wine is a bold drink — it deserves bold food alongside it. Whether you’re serving a homemade bottle at dinner or gifting it to a fellow foodie, the right pairing brings the flavors to life.
Top food pairings with elderberry wine:
- Roast meats – Think venison, duck, or even beef brisket
- Aged cheeses – Blue cheese, gouda, sharp cheddar
- Dark chocolate desserts – Chocolate lava cake, brownies
- Savory pies – Especially game or mushroom-based pies
- Spiced dishes – Anything with clove, cinnamon, or anise
If you’re already growing elderberries or preserving your harvest, don’t miss our guide on how to make apple and elderberry jelly — it’s a tasty treat that complements elderberry wine like a dream.

Is Elton John’s “Elderberry Wine” Really About Wine?
Yep, Elton John’s 1973 hit “Elderberry Wine” helped put this old-fashioned drink back in the spotlight — even if the lyrics weren’t exactly about fermenting fruit.
The song tells the story of a man longing for simpler times and the warmth of his lover’s homemade elderberry wine. While it’s more metaphor than winemaking manual, it’s one of the few pop songs to ever shout out this unique drink.
Fun fact: After the song gained popularity, elderberry wine started showing up more often in homebrew circles — and sparked curiosity among new generations.
Curious about how this old-school drink compares to other elderberry products? If you’ve ever wondered whether elderberry syrup or gummies are better, or if you’ve tried giving your kids daily elderberry vitamins, this wine brings a whole different vibe.

Ready to Make Your Own Elderberry Wine?
Whether you’re craving a bold, homemade wine or just want to try something new, elderberry wine is one of the most rewarding DIY projects out there. It’s a taste of tradition, health, and homesteading all in one beautiful bottle.
If you’re new to wine making, don’t overthink it. Grab the Wine Making Kit & Mead Making Kit – Complete Home Brewing Kit 🍷 that includes everything you need to get started: fermenter, glass carboy, siphon, hydrometer, airlock, and more. It works for both beginners and more experienced brewers who want reliable gear on hand.
And hey — once you’ve got your first batch bubbling, don’t stop there. Try pairing it with our apple and elderberry jelly for a gift basket that’ll impress anyone. Just don’t forget to save a bottle for yourself.
If you’re still curious about how elderberry affects your body, especially if you’ve had reactions before, check out our breakdown on stomach pain from elderberry to stay on the safe side.
The tradition of elderberry wine has been passed down through generations — now it’s your turn to raise a glass. 🍷 Cheers to that.
Elderberry Wine Recipe Variations Worth Trying
Once you’ve nailed the basic batch, the fun starts. Elderberry plays well with other flavors and a few tweaks can take your wine from good to genuinely impressive.
1-Gallon Elderberry Wine Recipe
The base recipe above makes a great starting point but here’s a tighter 1-gallon version that’s easier to manage for first-timers and produces less waste if something goes wrong:
- 2.5 lbs dried elderberries OR 3.5 lbs fresh/frozen
- 2 lbs granulated sugar
- 1 tsp acid blend
- ½ tsp yeast nutrient
- ¼ tsp pectic enzyme
- 1 Campden tablet (crushed) — added 24 hours before yeast
- 1 packet wine yeast (Lalvin EC-1118 or RC-212 both work well for elderberry)
- Water to fill to 1 gallon
The Campden tablet step is something most beginner recipes skip and shouldn’t. It kills off wild yeast and bacteria naturally present in the fruit before you introduce your wine yeast — giving your chosen yeast a clean environment to dominate. Skip it and you risk off-flavors from competing microorganisms.
5-Gallon Elderberry Wine Recipe
Ready to scale up? A 5-gallon batch follows the same ratios — multiply everything by five. The main differences at this scale:
- Use a 6-gallon primary fermenter to allow headspace during active fermentation
- You’ll need 5–6 lbs of sugar total, added in stages rather than all at once — this prevents stressing the yeast
- Aging time increases slightly — expect 8–12 months for best results at this volume
- You’ll get approximately 25 bottles from a 5-gallon batch
Old-Fashioned Elderberry Wine Recipe
This is the version your great-grandmother might have made — minimal equipment, straightforward ingredients, no specialist additions:
- 3 lbs fresh elderberries
- 3 lbs white sugar
- 1 lemon, juice and zest
- 1 orange, juice and zest
- 1 gallon boiling water
- 1 slice toast with bread yeast spread on it (traditional method) OR 1 packet wine yeast
Pour boiling water over berries and mash. Add sugar, citrus, and stir until dissolved. Cool to room temperature, float the toast yeast-side down on the surface, cover with a cloth, and leave for 5–7 days. Strain and bottle in sterilized bottles. Ready to drink in 3 months, better at 6.
It won’t be as controlled or consistent as the modern method but it connects you to centuries of tradition — and it genuinely works.
Elderberry and Blackberry Wine
Blackberry adds a jammy depth that rounds out elderberry’s tartness beautifully. Replace 1 lb of elderberries with 1 lb of blackberries in your base recipe. The result is a richer, more complex wine with slightly less of elderberry’s signature earthiness — excellent for people who find straight elderberry wine a bit intense.
Spiced Elderberry Wine
Add during the secondary fermentation stage — not primary — to avoid the spices overwhelming the fermentation:
- 1 cinnamon stick
- 4 whole cloves
- 1 star anise
- Optional: a small piece of dried orange peel
Leave in for 2 weeks maximum then remove before bottling. The result is essentially a still mulled wine — perfect for winter and genuinely impressive as a gift.


Using Dried Elderberries for Wine — Does It Work?
Fresh or frozen elderberries are ideal but dried elderberries make completely acceptable wine — and they’re available year-round, which makes them practical for most home brewers.
The key differences when using dried:
Use less by weight. Dried elderberries are concentrated — roughly 1 lb of dried equals 2.5–3 lbs of fresh. Most recipes calling for 3 lbs fresh will work with just 1–1.5 lbs dried.
Rehydrate before use. Pour boiling water over dried berries and let them soak for 30 minutes before mashing and proceeding with your recipe. This softens them and improves juice extraction significantly.
Color and tannin are stronger. Dried elderberries produce a darker, more tannic wine than fresh. If you find the result too astringent, a small addition of glycerin at bottling (1–2 tablespoons per gallon) smooths it out without affecting flavor noticeably.
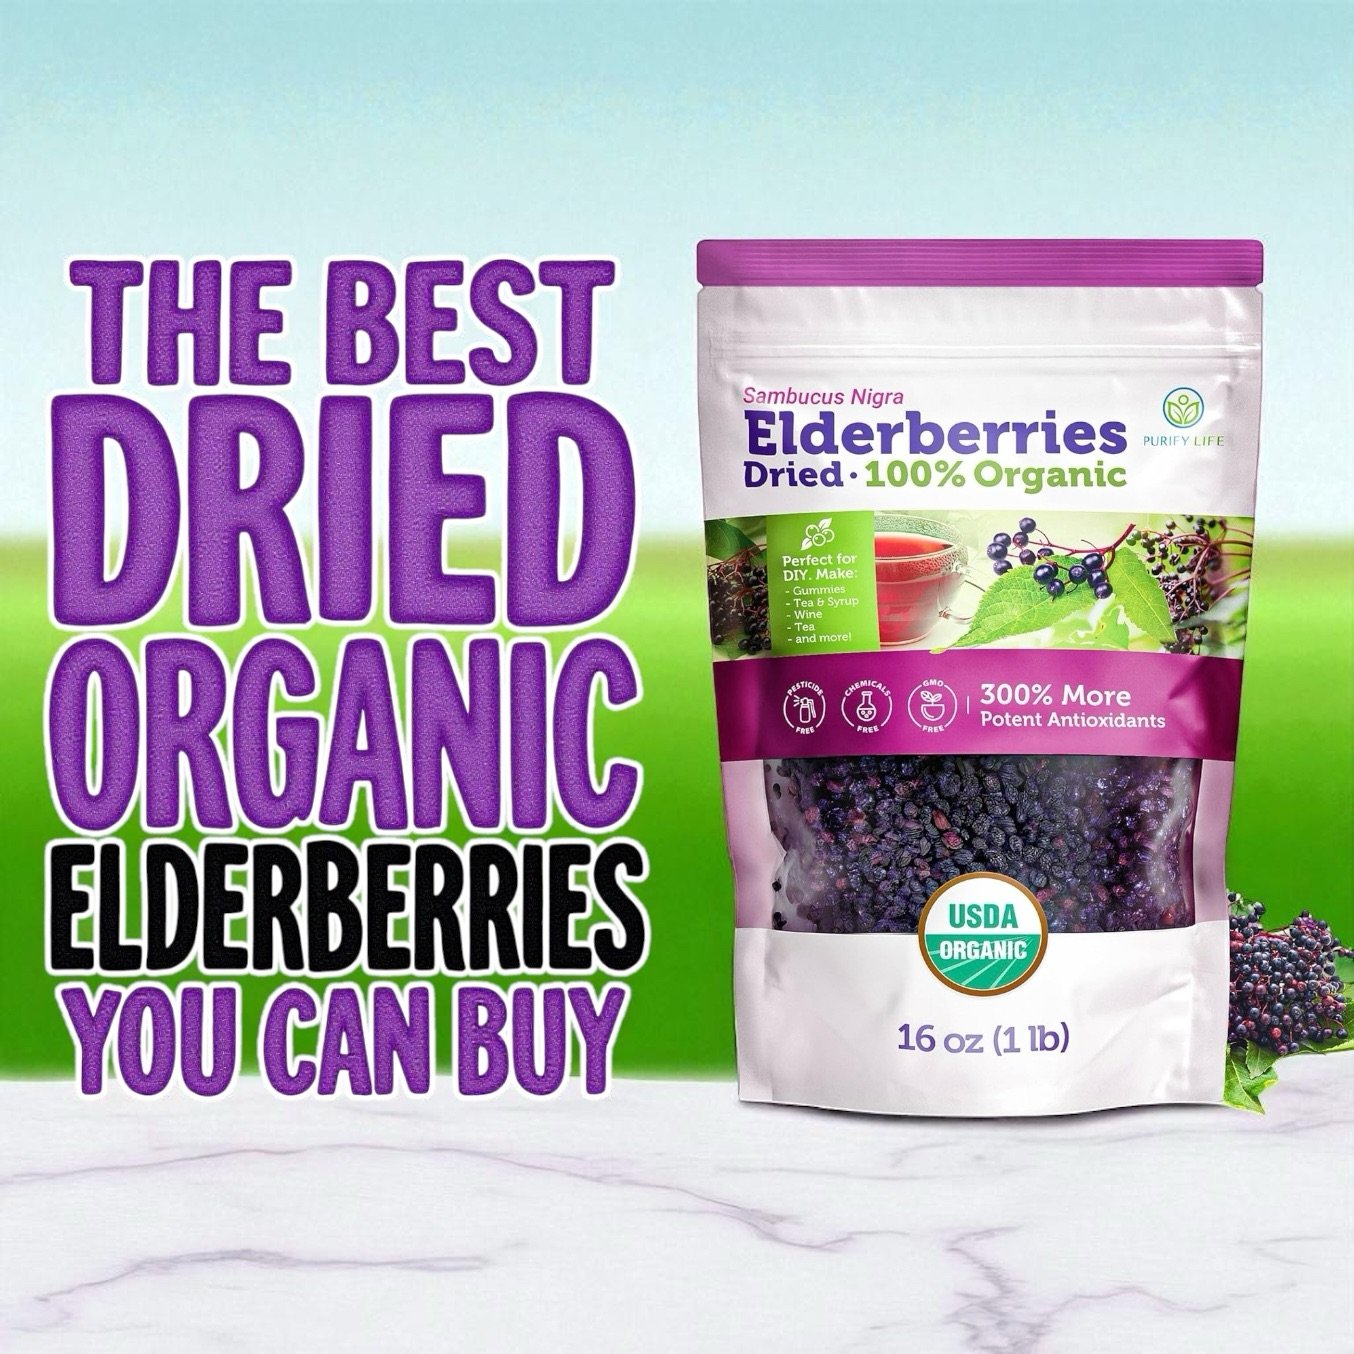
For sourcing quality dried elderberries — the variety and processing method matters more than most people realize — this covers what to look for: the best dried organic elderberries you can buy.
Troubleshooting Your Elderberry Wine
Fermentation won’t start:
Check your yeast — it may be old or dead. Proof it in warm water with a pinch of sugar before adding to your must. Also check temperature — wine yeast is most active between 65–75°F. Too cold and it stalls.
Wine is too tart or acidic:
This is common with elderberry. Solutions: let it age longer (tartness mellows significantly over 6–12 months), add a small amount of potassium bicarbonate to reduce acidity, or back-sweeten slightly at bottling with dissolved sugar or grape concentrate.
Wine is cloudy and won’t clear:
Elderberry wine can be slow to clear due to its high pectin content. Adding pectic enzyme at the start of fermentation prevents most cloudiness. If you’re already past that point, fining agents like bentonite or Sparkolloid added during secondary fermentation will clear it within a few weeks.
Off-flavors — vinegar smell or taste:
This is acetic acid bacteria contamination, almost always caused by inadequate sanitation or too much oxygen exposure during fermentation. Unfortunately this batch is likely lost. The lesson: sanitize everything obsessively and keep your airlock filled.
Wine tastes flat or thin:
Low body in elderberry wine usually means insufficient fruit or sugar. For future batches, increase elderberries slightly and consider adding grape tannin powder (available at homebrew stores) to add structure and mouthfeel.
Sediment in the bottles:
Normal for unfiltered homemade wine. Stand bottles upright for 24 hours before serving so sediment settles to the bottom. Pour carefully and leave the last half inch in the bottle.


How to Store Elderberry Wine Properly
Proper storage makes a significant difference in how your wine develops — especially if you’re aging it for a year or more.
Temperature: 55–65°F is ideal. A basement, cellar, or cool closet works well. Avoid anywhere with temperature fluctuations — consistency matters more than the exact number.
Position: Store bottles on their side if they have corks. This keeps the cork moist and prevents it from drying out and letting air in. Screw-cap bottles can stand upright.
Light: Keep wine away from direct light, especially sunlight. UV exposure degrades wine faster and can cause off-flavors. A dark cabinet or box is ideal.
Vibration: Minimal vibration is better. Don’t store wine next to appliances that hum or vibrate — it disturbs the sediment and can slow the aging process.
Stored correctly, elderberry wine improves for 2–3 years and remains drinkable for 4–5. Unlike many fruit wines that fade quickly, elderberry’s high tannin content gives it genuine aging potential.
For storing your finished elderberry syrup or other elderberry preparations alongside your wine-making setup, these airtight glass storage jars work perfectly and look great in a pantry or cellar.
Elderberry Wine vs. Elderberry Syrup — Which Is Better?
Different tools for different purposes — but a fair comparison since many people use the same harvest for both. Elderberry Wine Elderberry Syrup Immune benefit Reduced (alcohol degrades some anthocyanins) High — concentrated active compounds Alcohol content 10–13% ABV None Time to make 3–12 months 45 minutes Cost per batch $10–15 for 1 gallon $5–7 for 16oz Shelf life Years when stored properly 2–3 weeks refrigerated Best for Enjoyment, gifting, tradition Immune support, daily use, kids
The short version: make syrup for health, make wine for enjoyment. If you have a good harvest, there’s no reason not to do both. For a detailed elderberry syrup guide: how to make elderberry syrup from fresh elderberries.

Growing Your Own Elderberries for Wine
If you’re serious about elderberry wine long-term, growing your own eliminates the annual scramble to source enough berries and gives you complete control over quality. A mature elderberry bush yields 12–15 lbs of berries per season — enough for a solid 3–4 gallon batch of wine plus syrup, jelly, and whatever else you want to make.
American elderberry (Sambucus canadensis) is the most practical choice for most U.S. growers — cold-hardy, productive, and well-adapted to a wide range of conditions. European elderberry (Sambucus nigra) produces larger individual berries with a slightly different flavor profile that many winemakers prefer.
Plant two varieties for cross-pollination and your yield doubles. Full growing guide: how to grow elderberries at home — what nobody tells you before you plant.
If you want to skip the nursery hunt and start with quality plants, American elderberry plants from Weaver Family Farms Nursery are specifically selected for strong production and disease resistance.
Frequently Asked Questions About Elderberry Wine
How much alcohol is in elderberry wine?
Typically 10–13% ABV depending on how much sugar you use and how fully it ferments. A hydrometer reading before and after fermentation gives you the exact number for your batch.
Can I use elderberry wine to make elderberry syrup?
No — the alcohol changes the properties significantly and the result won’t have the same immune-supportive qualities as syrup made from raw or cooked berries. Keep them as separate projects.
How many elderberries do I need for a gallon of wine?
2.5–3.5 lbs of fresh or frozen elderberries per gallon, or 1–1.5 lbs of dried elderberries per gallon.
Can I make elderberry wine without wine yeast?
Yes — traditional recipes use bread yeast or wild yeast from the fruit’s natural surface. The result is less predictable and often less clean-tasting than with dedicated wine yeast, but it works and connects you to how this wine was historically made.
Is elderberry wine safe to drink?
Yes — the fermentation process destroys the cyanogenic compounds present in raw elderberries. Properly made elderberry wine from cooked or fermented berries is completely safe. The danger is specifically with raw, unprocessed elderberries — not the finished wine.
Why does my elderberry wine taste bitter?
Stems or seeds likely made it into your must. Both contain higher concentrations of tannins and the compounds that cause bitterness. Be meticulous about removing all stems during preparation. Aging also softens bitterness significantly — give it more time before concluding it’s ruined.
Can you make elderberry wine from elderberry syrup?
Technically yes but the result is unpredictable and usually not worth the effort. You’d need to dilute the syrup significantly (it’s too concentrated and too sweet to ferment well as-is) and you’d be working around the honey and spices already in the syrup. Better to start from fresh or dried berries.
What yeast is best for elderberry wine?
Lalvin RC-212 (Burgundy) is a popular choice — it enhances the dark berry character of elderberry and handles the high tannin environment well. Lalvin EC-1118 (Champagne) is more neutral and produces a cleaner, drier result. Both work. Avoid bread yeast if you want predictable, clean fermentation.
As an Amazon Associate we earn from qualifying purchases through some links in our articles.